If the shoe fits, wear it.

I’m not exactly sure why my friend Rosie, shared this with the whole, wide, world. On my Facebook page nonetheless.

Anyway, that doesn’t matter…

I bought this pattern from ithinksew back in the spring. This is the same company that brought us the fabulous sew along book, One Yard Wonders that so many have sewn along with!  They now have a second book, Fabric-by-Fabric One Yard Wonders that looks great, too!

Anyway… at the time they had the leather, for the soles, on sale. Now it looks like it is the new regular price. Gotta love price rollbacks!
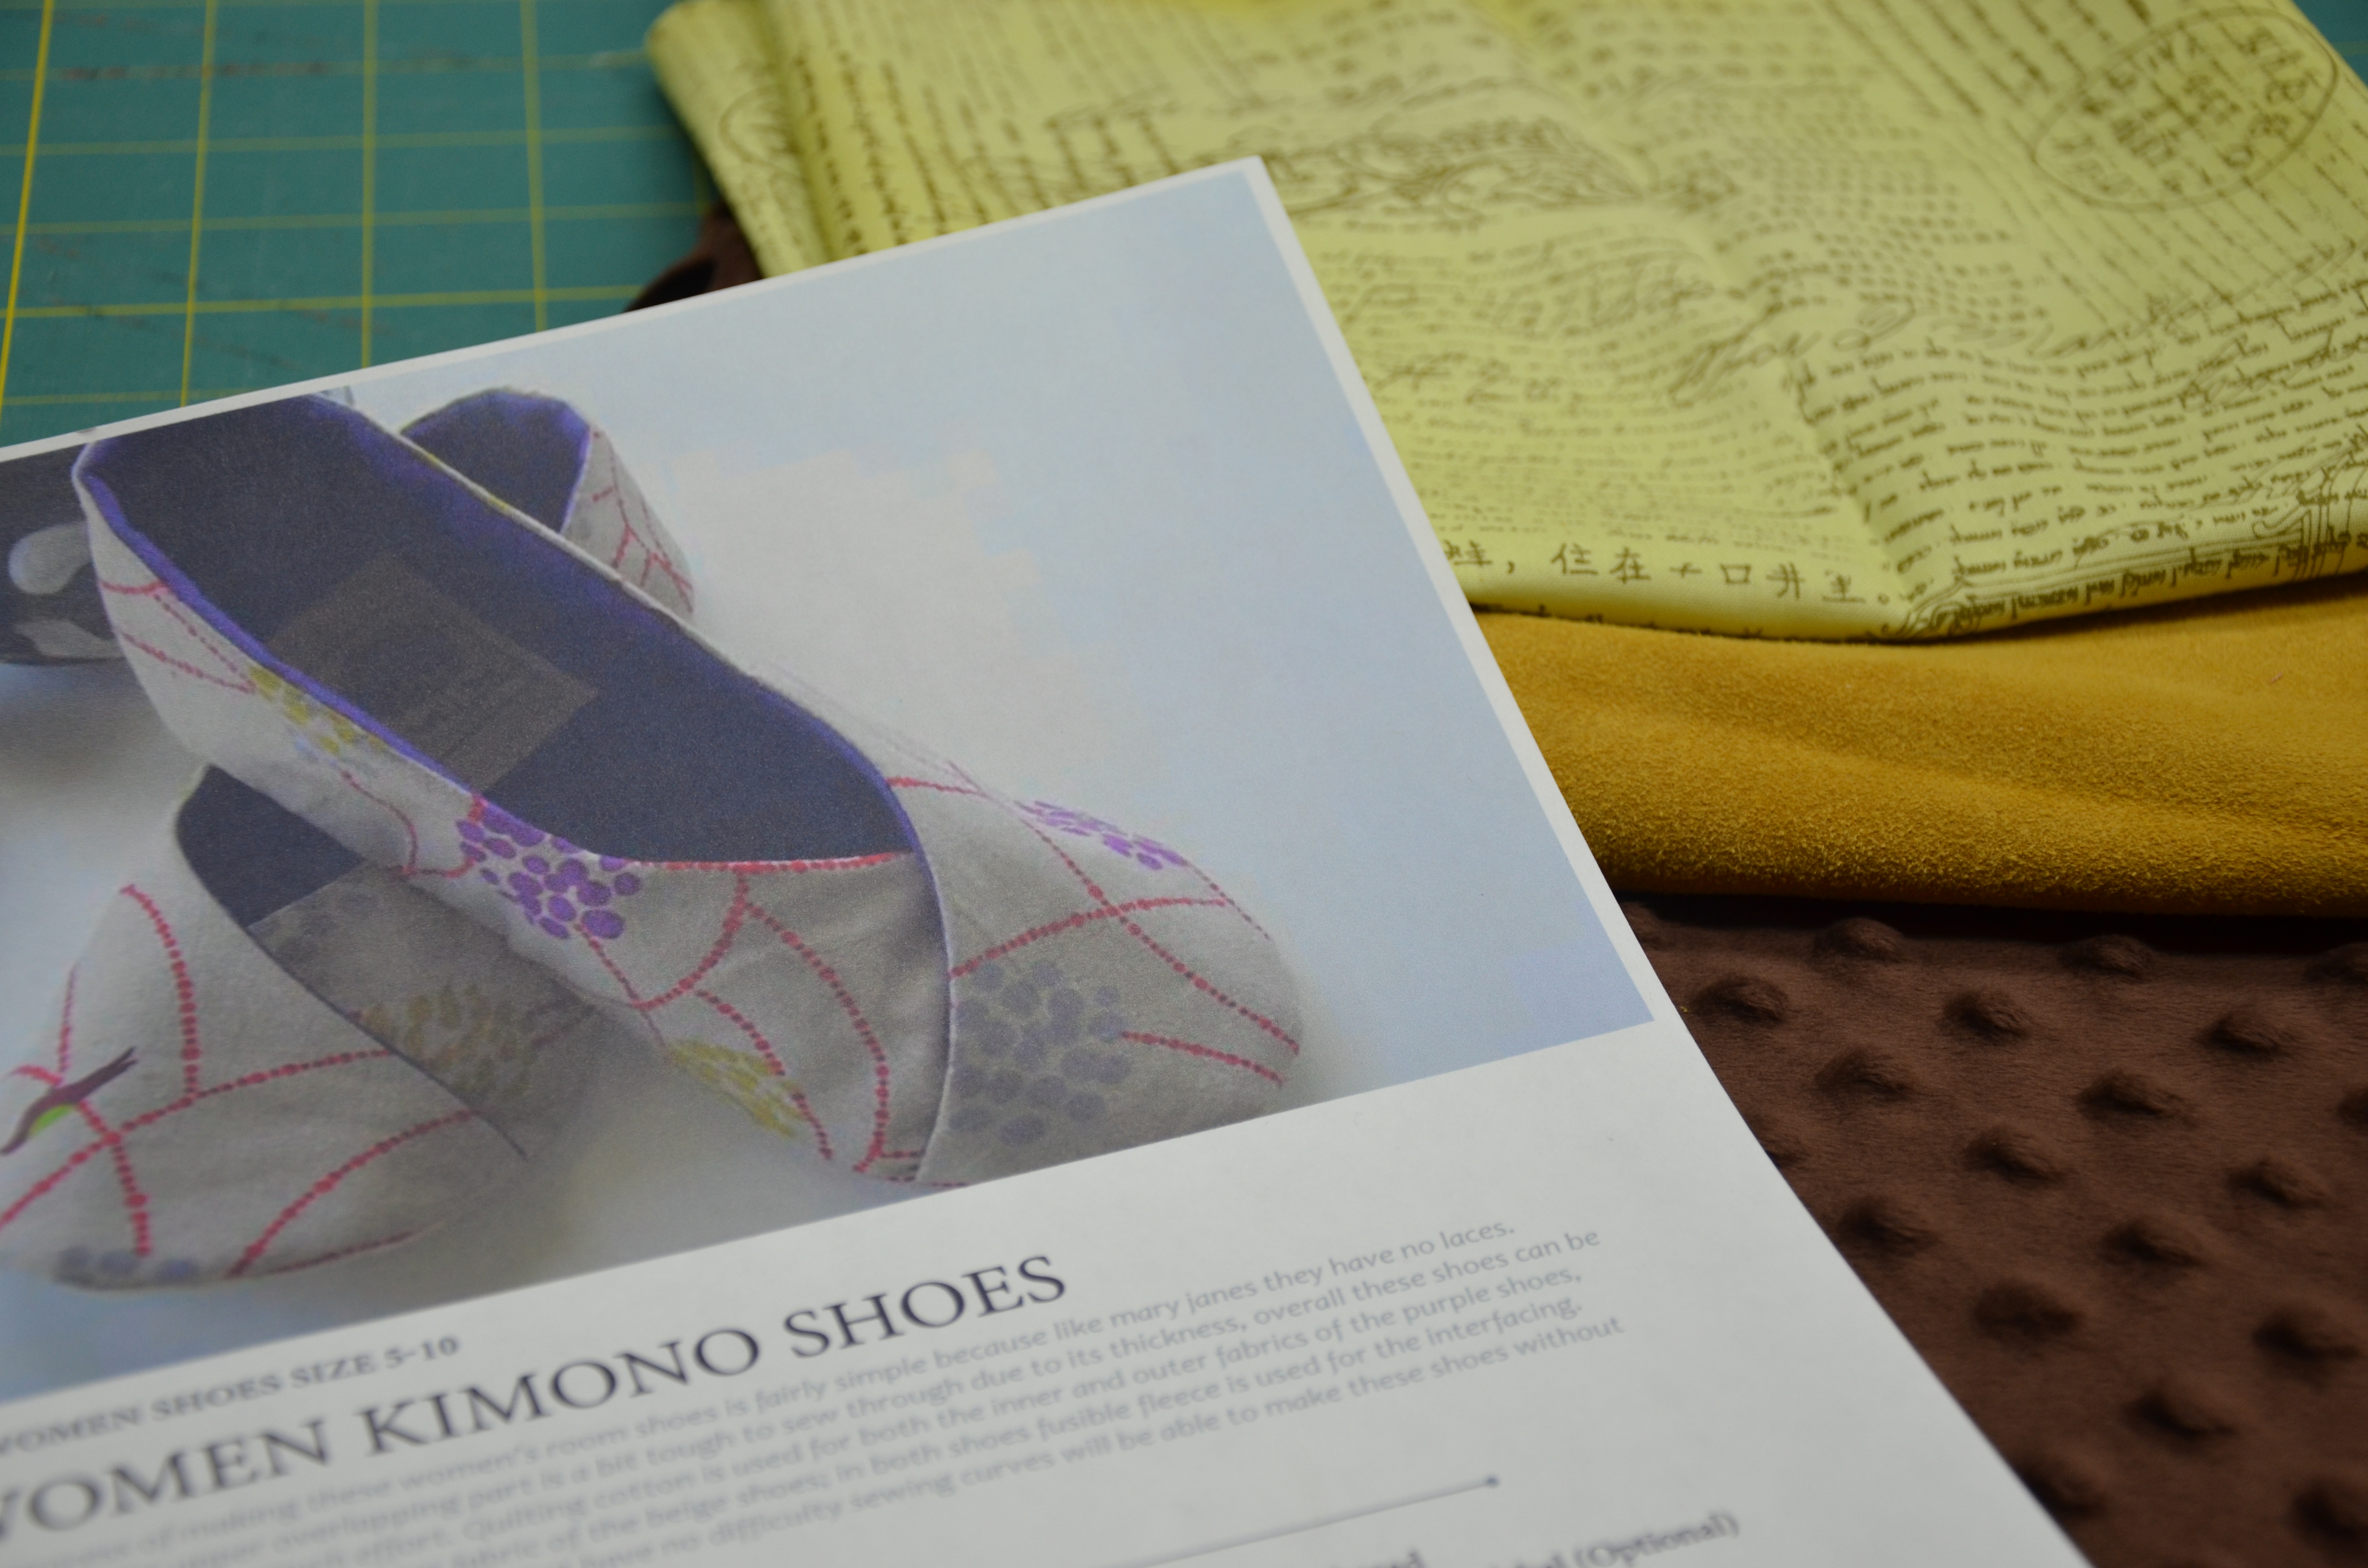
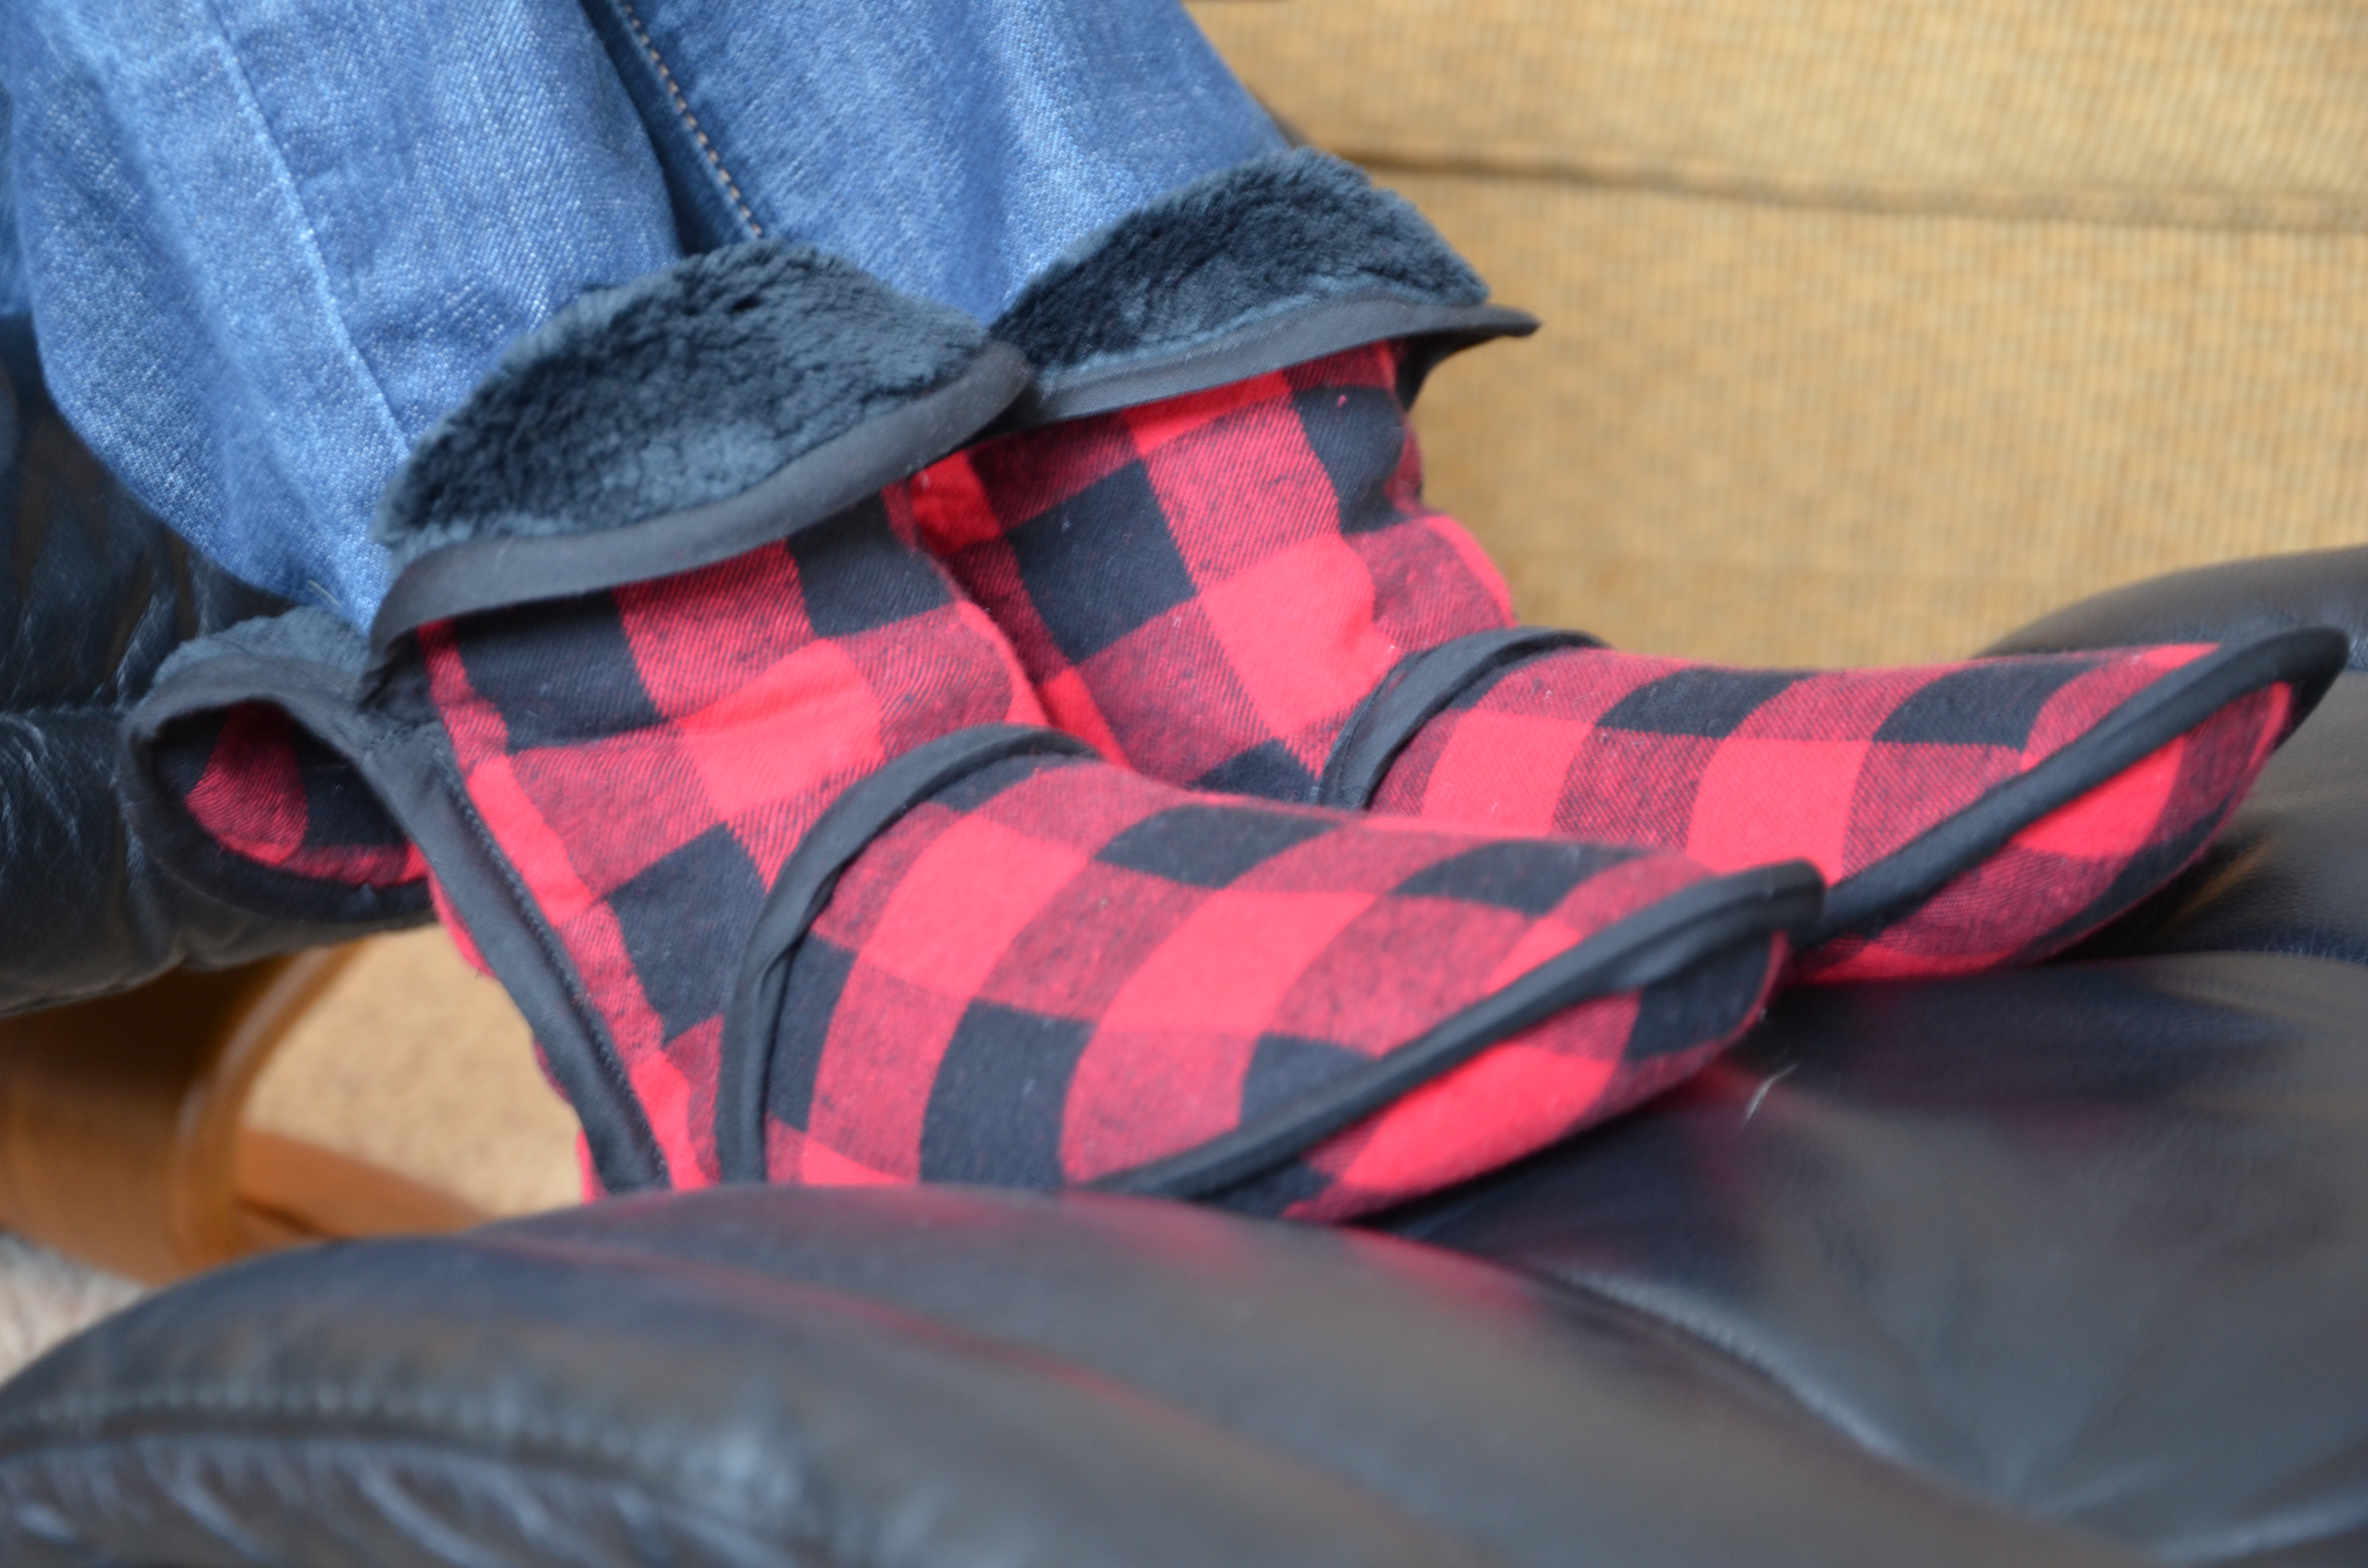
houseshoes pattern

House shoes pattern

Daughter has worn plumb through the slippers we made in December.  Granted, they did have a flannel sole and she does live in them…. And even though winter has long gone, her feet were still cold and we can’t have that…

It was high time I tried my hand at leather sewing. It has been a while. A long while. So long that I have no idea what happened to the leather foot, for my Bernina, but it seems it wasn’t really necessary. This suede is really soft and supple. Parts of it were thicker, parts thinner, just as our own skin is, I suppose. Sewing with it against the surface of the machine, no problem. Sewing with it facing the foot, a little sticky… Either way, I wouldn’t want to do topstitching, where stitch consistency matters. Overall not at issue, but if you have never set in a sole (similar to a sleeve) then leather might not be your best, first choice.

I have to say, I’m not very good at reading directions when sewing. I like to read. I actually love to read. I just like to move faster than stopping to read directions allows! I like to look at the pictures and then just do it. This new slipper pattern was perfect for that. Lots of clear pictures. I say lots. I mean LOTS. Something went awry with my printer and it printed this pattern 3 times and then some. Each pattern is somewhere along the lines of 20 pages. I didn’t realize my printer held so much paper. Or ink….

I digress. This pattern is a PDF and comes with sizes 5-10 and lots of instructions, thus lots of pages. Just print the two or three pattern pages you need for cutting. The actual pattern is only two pieces, except in the larger sizes, where the sole pieces are too large for one sheet of paper and print in halves and then get taped together.

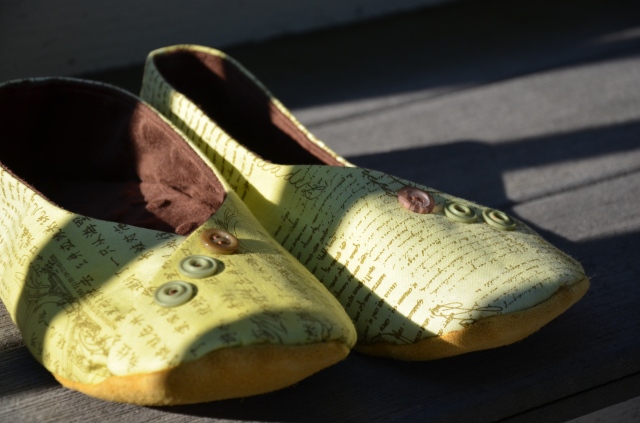
I happened upon this wonderful Asian print and knew I had to buy it. Seriously. It’s a kimono slipper pattern, you know? It’s Bohemian Soul in Letter, (a mottled yellow) Green by Top Drawer.
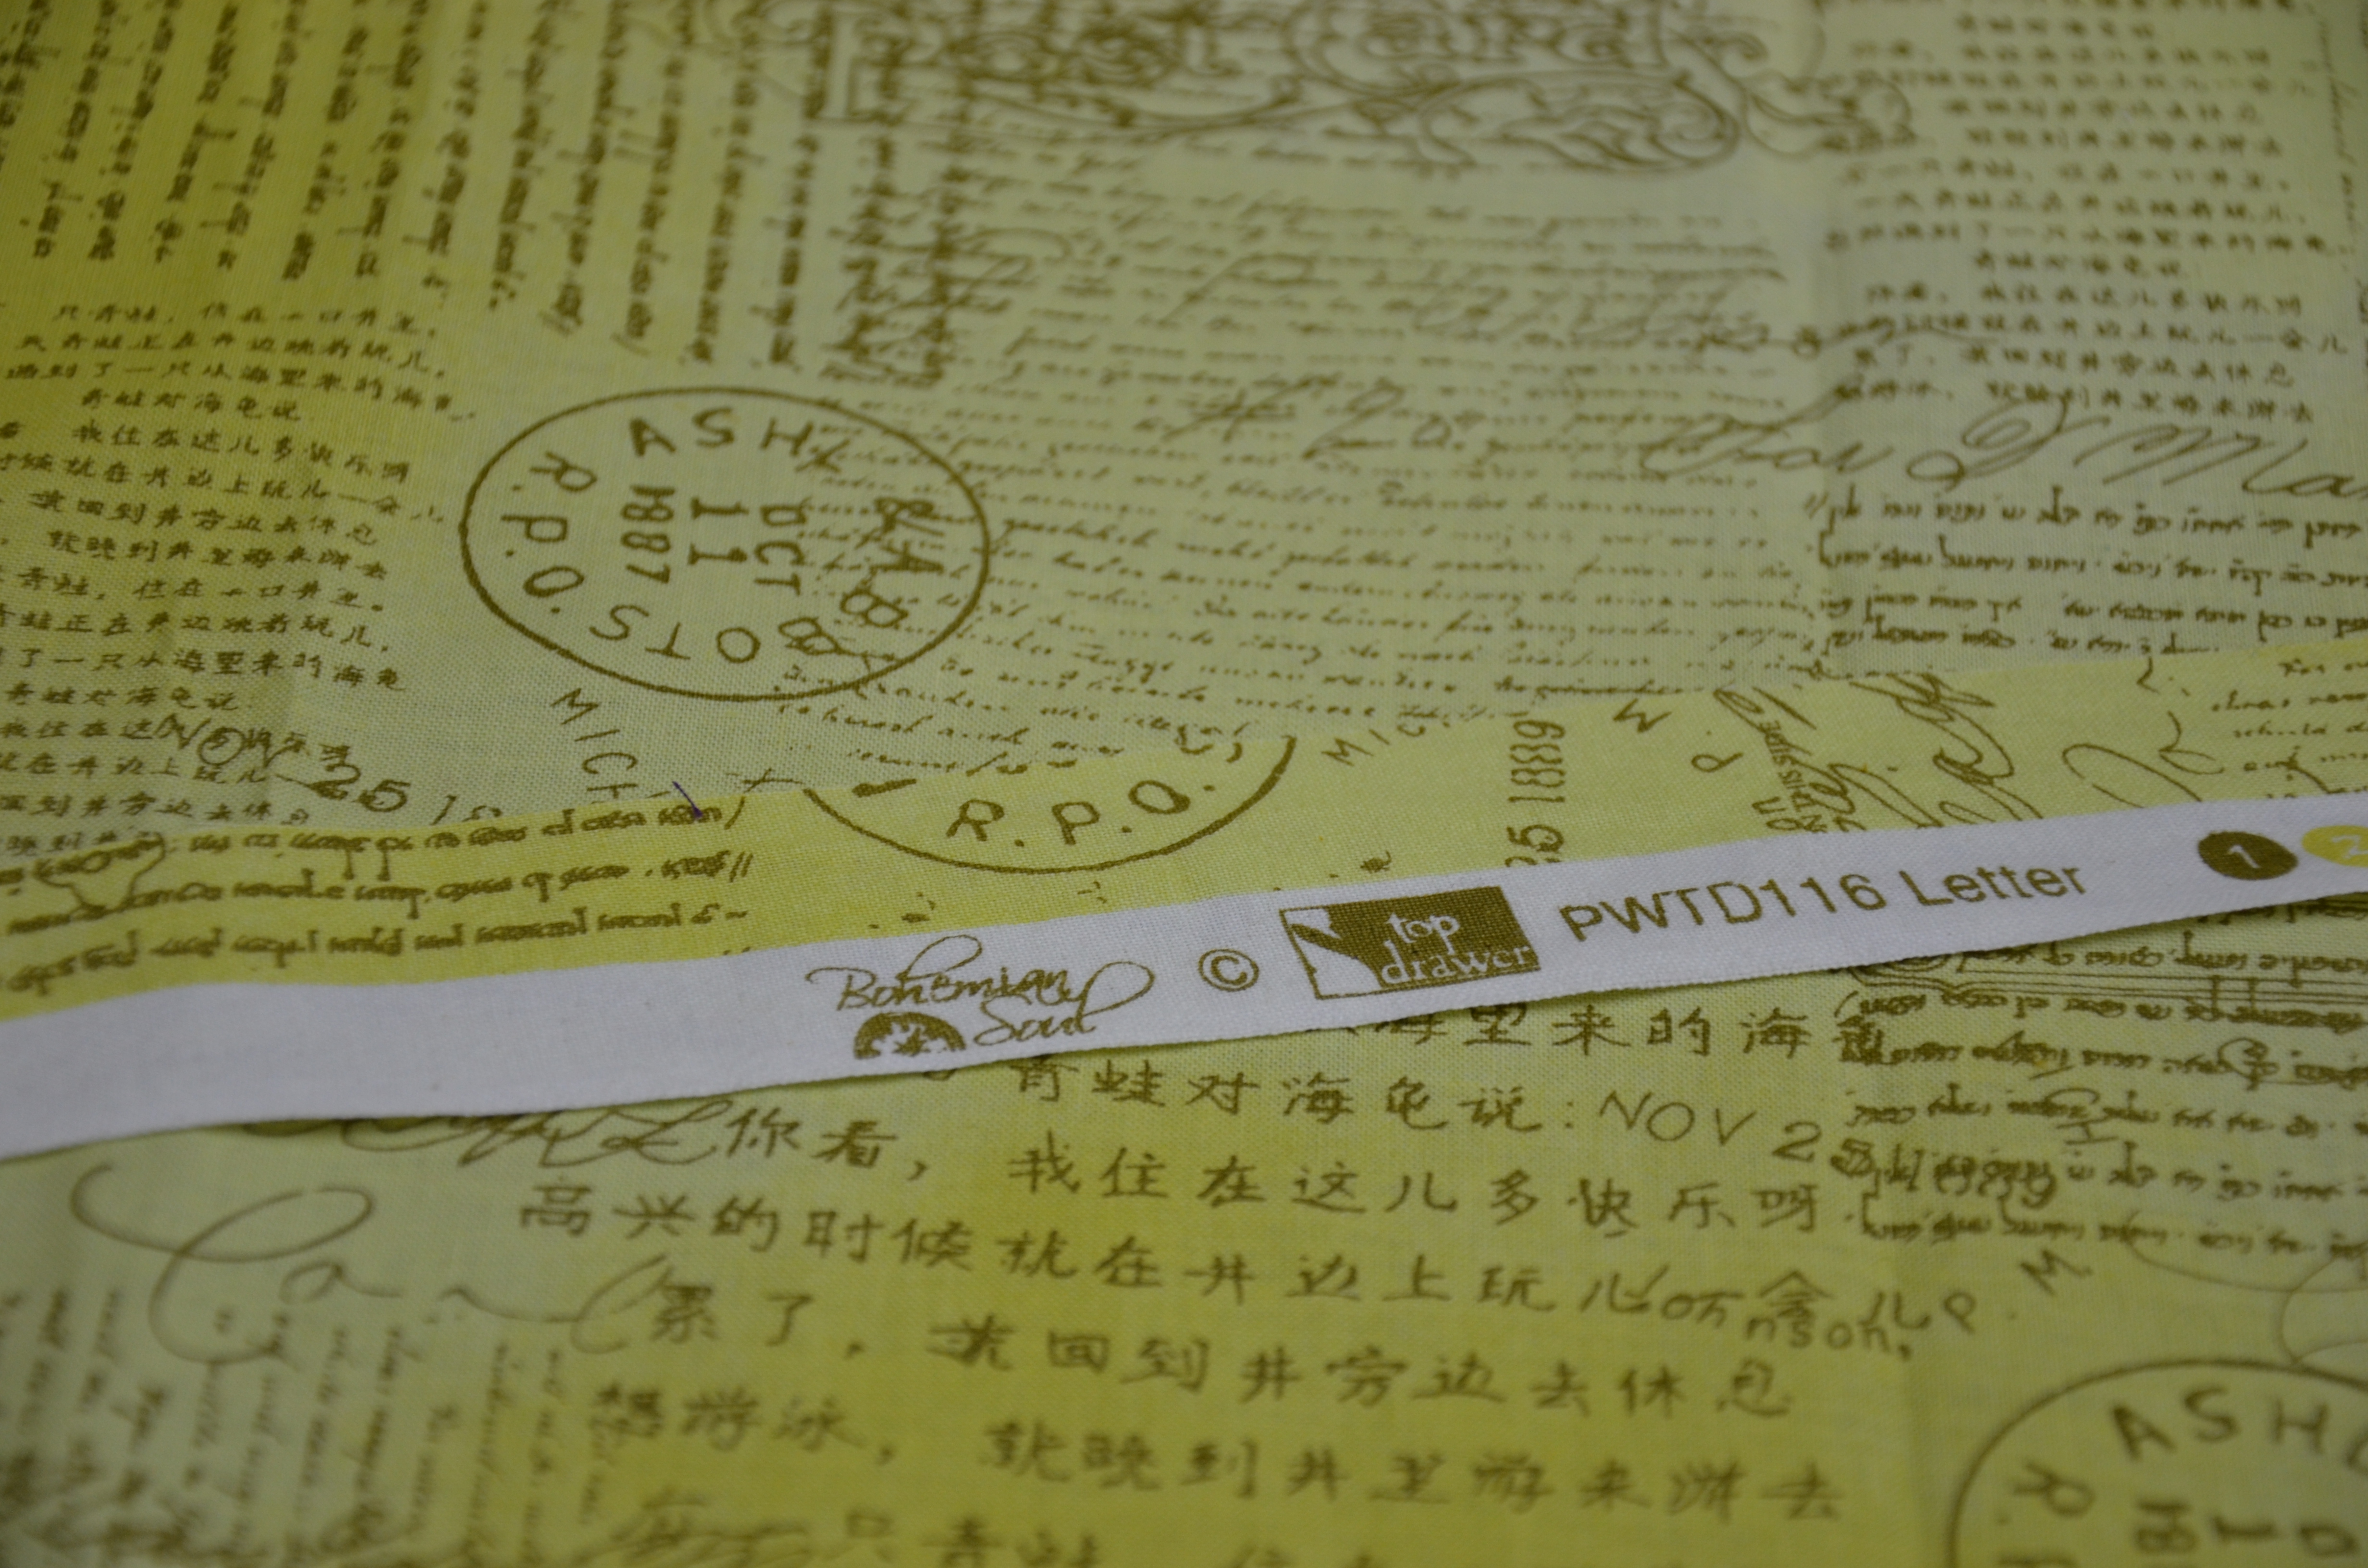
The pattern calls for 1/2 yard, and since I only used it for the exteriors, there is plenty left for other projects. If you are only doing the exterior you just need a piece 7 x 32″, 1/4 yard is no issue.
This went beautifully with the leather and I picked up 1/4 yard of dark brown Minky for the lining. My first time using Minky. I know! It is perfect for slipper linings. And once again 1/4 yard was plenty for the interior and the top of the inner sole. I used Kona cotton brown for all the other parts that didn’t really matter.

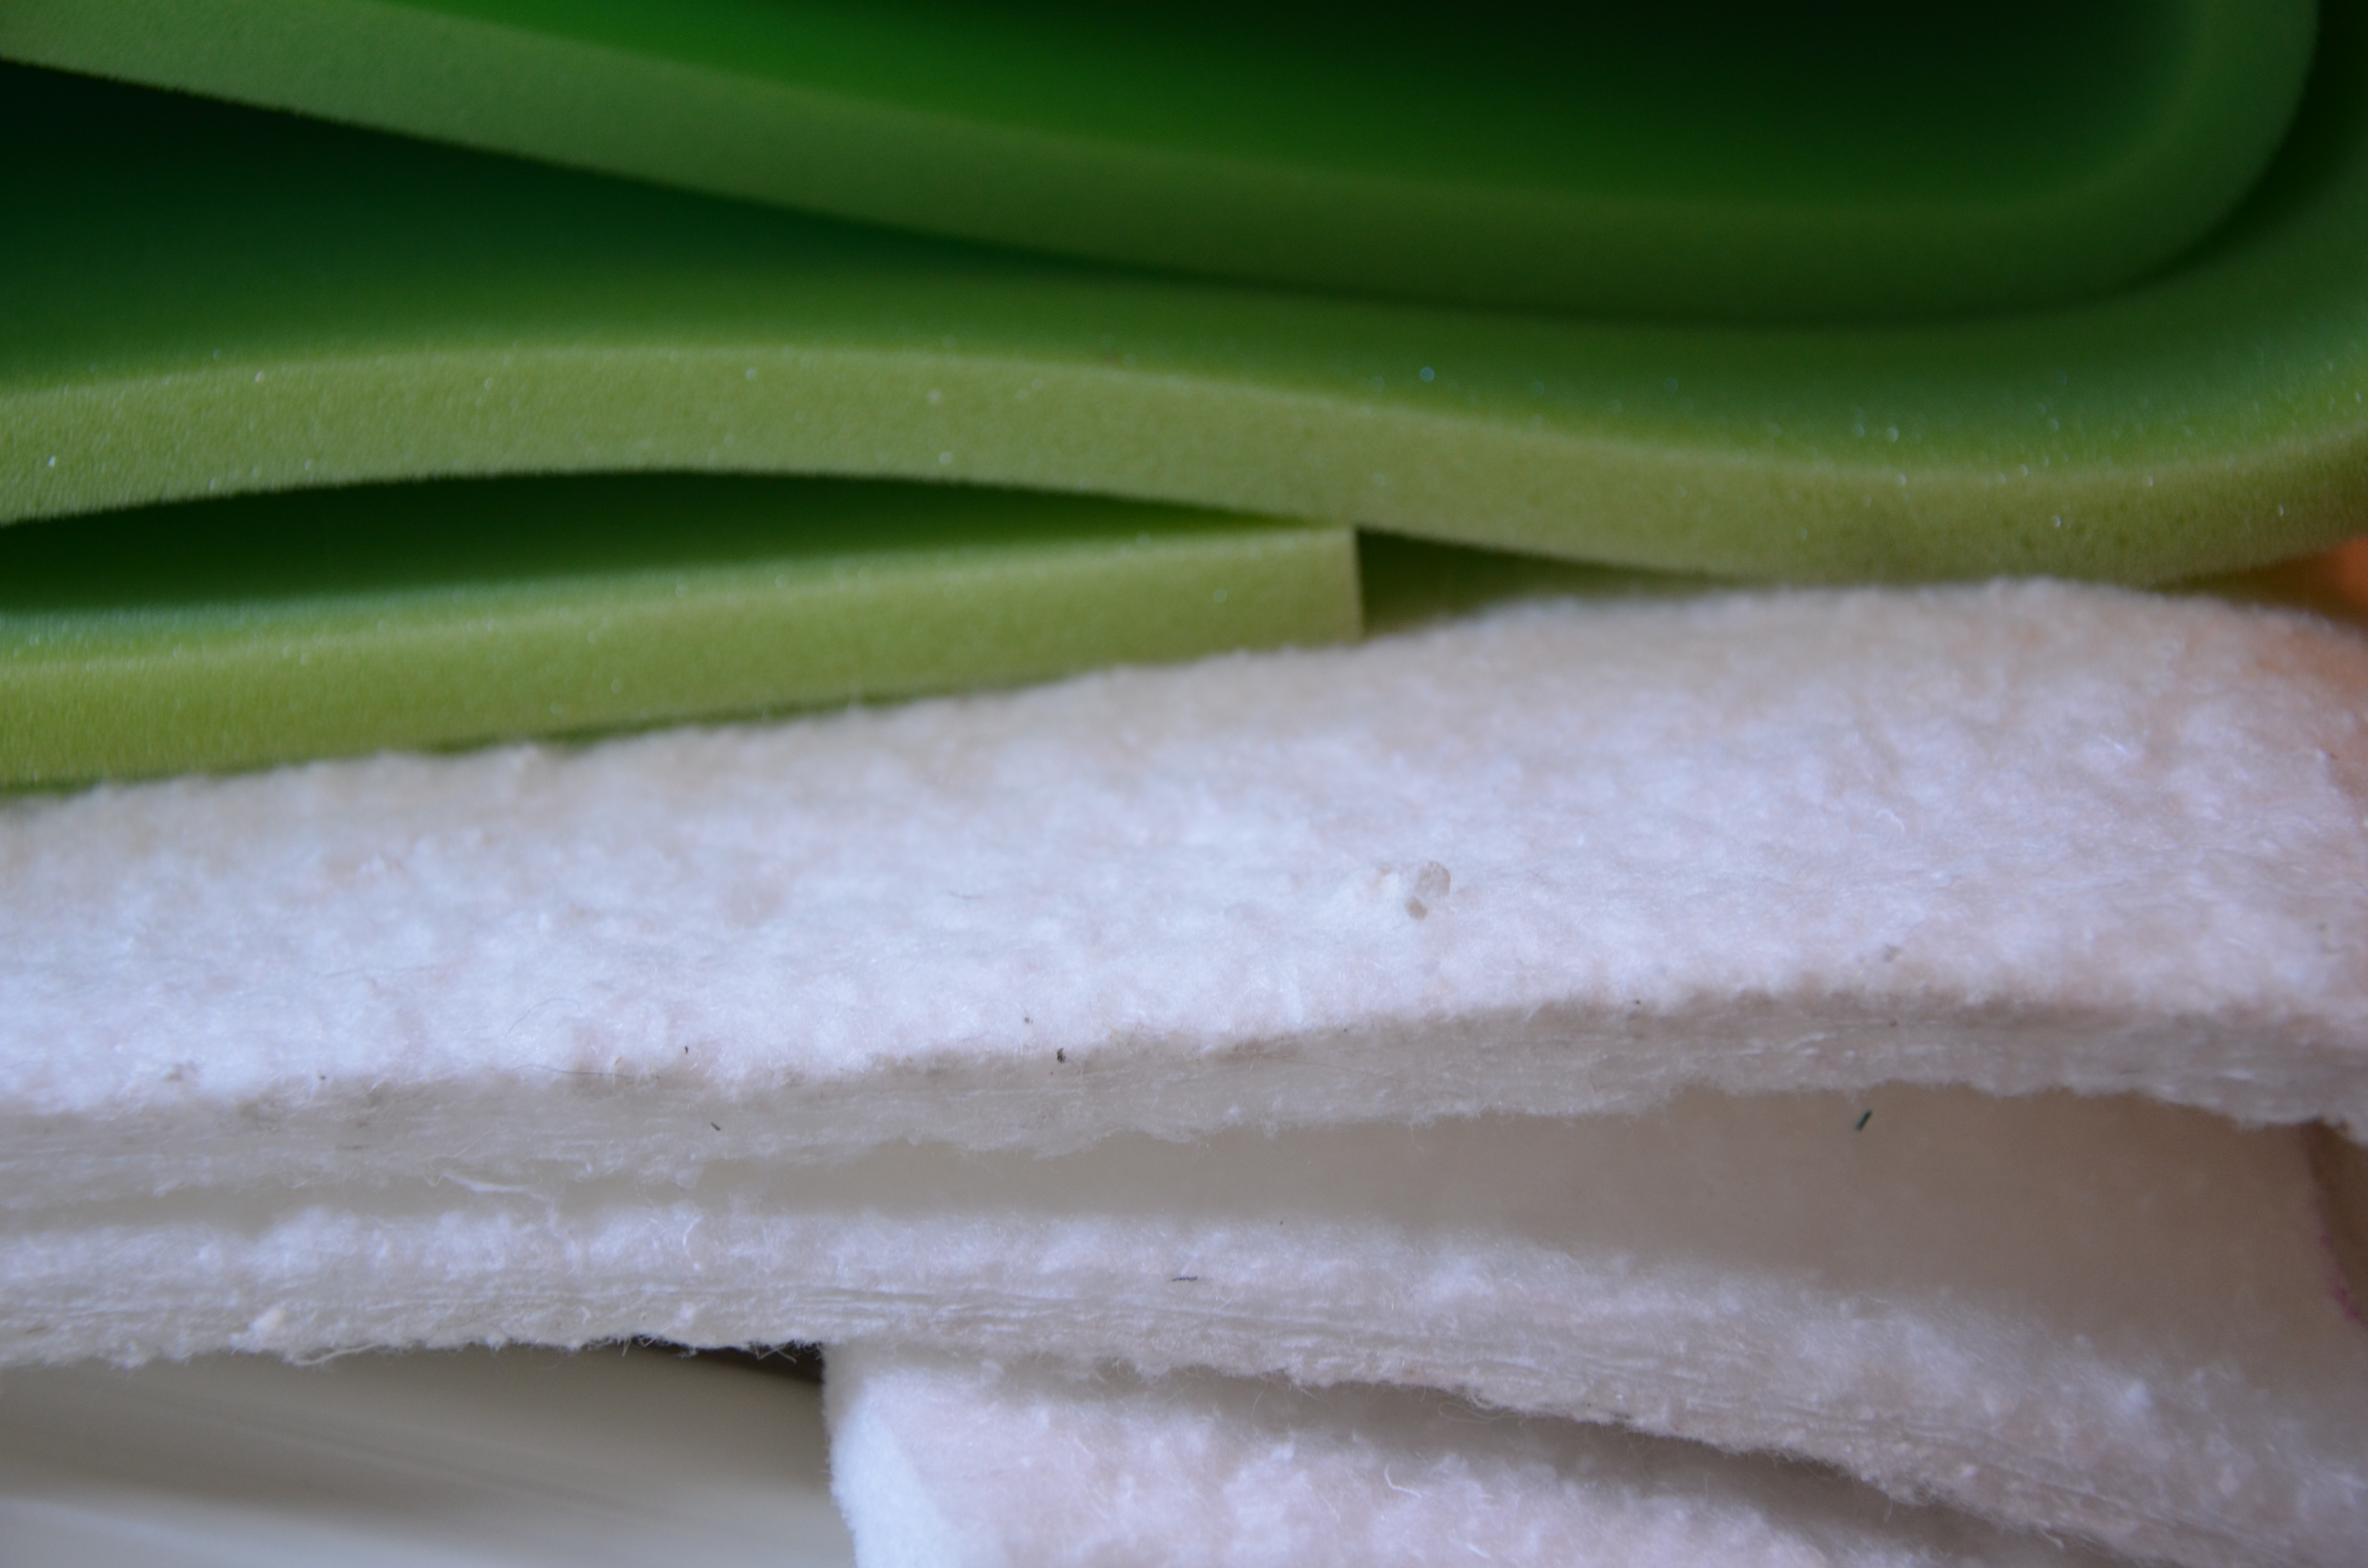
I had some 1/2″ thick, dense, cotton padding, used in upholstery, to line the inner soles with, for extra cushion. It worked well, but needed to be cut down, an extra seam allowance, to make up for its thickness. I think you could easily use 1/2″ green foam for another cushy option.

I added buttons from my Grandma’s button box for added detail. It wasn’t called for, but I like to share Grandma’s buttons whenever I can.

This pattern was easy, precise, fits well and I’m sure we will be making them again.
House shoes pattern, slipper pattern

Because daughter can go through some slippers!

And we won’t even mention her shoe~aholic tendencies….
 

tuesday linky

Posted in A Sttitch in Time, Books, fabric, Fabric Tuesday, Review, Sewing | Tagged , , , , , , , , | 6 Comments

What to do, what to do….

So……

Over on Facebook I am really enjoying hanging out with the Celebrate Hand Quilting group. Lots of good hints, tips, recommendations and quilts! Wow, I feel like such a loser when you look at their quilts! I especially like the instant feedback on everything. They are a very encouraging bunch! And so smart!

A few days ago I asked for help on what to do with the border, on this wall hanging, that has been in the works, for quite a while now. The circle quilting is finally complete and who better to go to than my quilty friends both there *and* here.

I pretty much discounted carrying the circles into the border because I think I wanted something different; to showcase, not dilute, what the rest of the quilt was doing. And I think my borders needed to be wider to pull that off.

One suggestion was straight line quilting, 1″ apart, on the inner (rust) border then crosshatching outside of that. The problem is math. Using 1″ straight line quilting, the math just doesn’t allow you match it up and continue on with crosshatching. The crosshatching ends up at about 5/8″. Pretty tight and heavier quilting than the balanced quilting throughout the rest of the piece.

And you can expect the opposite when you reverse it… Nice 1″ crosshatching causes tight straight line quilting, half of which are now hanging mid-air, with nothing to match it up with. I like that it’s tighter and kind of *points* to the quilting on either side, but…. they are just hanging there…

Then I could always just use crosshatching all the way up through both borders and be done with it. Marking and quilting would both be done a whole lot faster!

Or maybe you have another completely different idea.

I have nothing else to quilt on and the Olympics have started. I need help!

What do you think? Any thoughts?

Posted in hand quilting, Quilting, WIP | Tagged , , , , , , , , | 12 Comments

Sewfrench's avatarSewfrench

I’ve always said going gluten-free wasn’t that hard, for me. I’ve never been a huge bread lover, like some people. Okay, maybe a nice crusty loaf at a good restaurant, a pizza crust in Chicago, fresh pasta in Italy…. I digress as my stomach rumbles…

And now with BLT season upon us, I am tempted by the smell of toast. But a BLT is not about the toast, it’s about the tomato, in my opinion.

I ♥ tomatoes! And this Ox Heart tomato, weighing it at over a pound, was a delight to sink my teeth in to!

But what is a BLT without bread to wrap it in? It’s still good just wrapped in lettuce, my usual sandwich wrap. But to wrap it in a wheat free bread would be delightful!

Behold, my latest and greatest, gluten-free sandwich wrap! This recipe is a winner! The recipe isn’t mine but the…

View original post 664 more words

Posted in Uncategorized | Leave a comment

How about an ear-worm to carry you through the day???

Every time I type Honeycomb, this is what gets stuck in my ear. How about you???

Busy living life = not enough time, in the day,  to blog… Ya know???

I should have warned you it would be like this, especially in the height of summer.

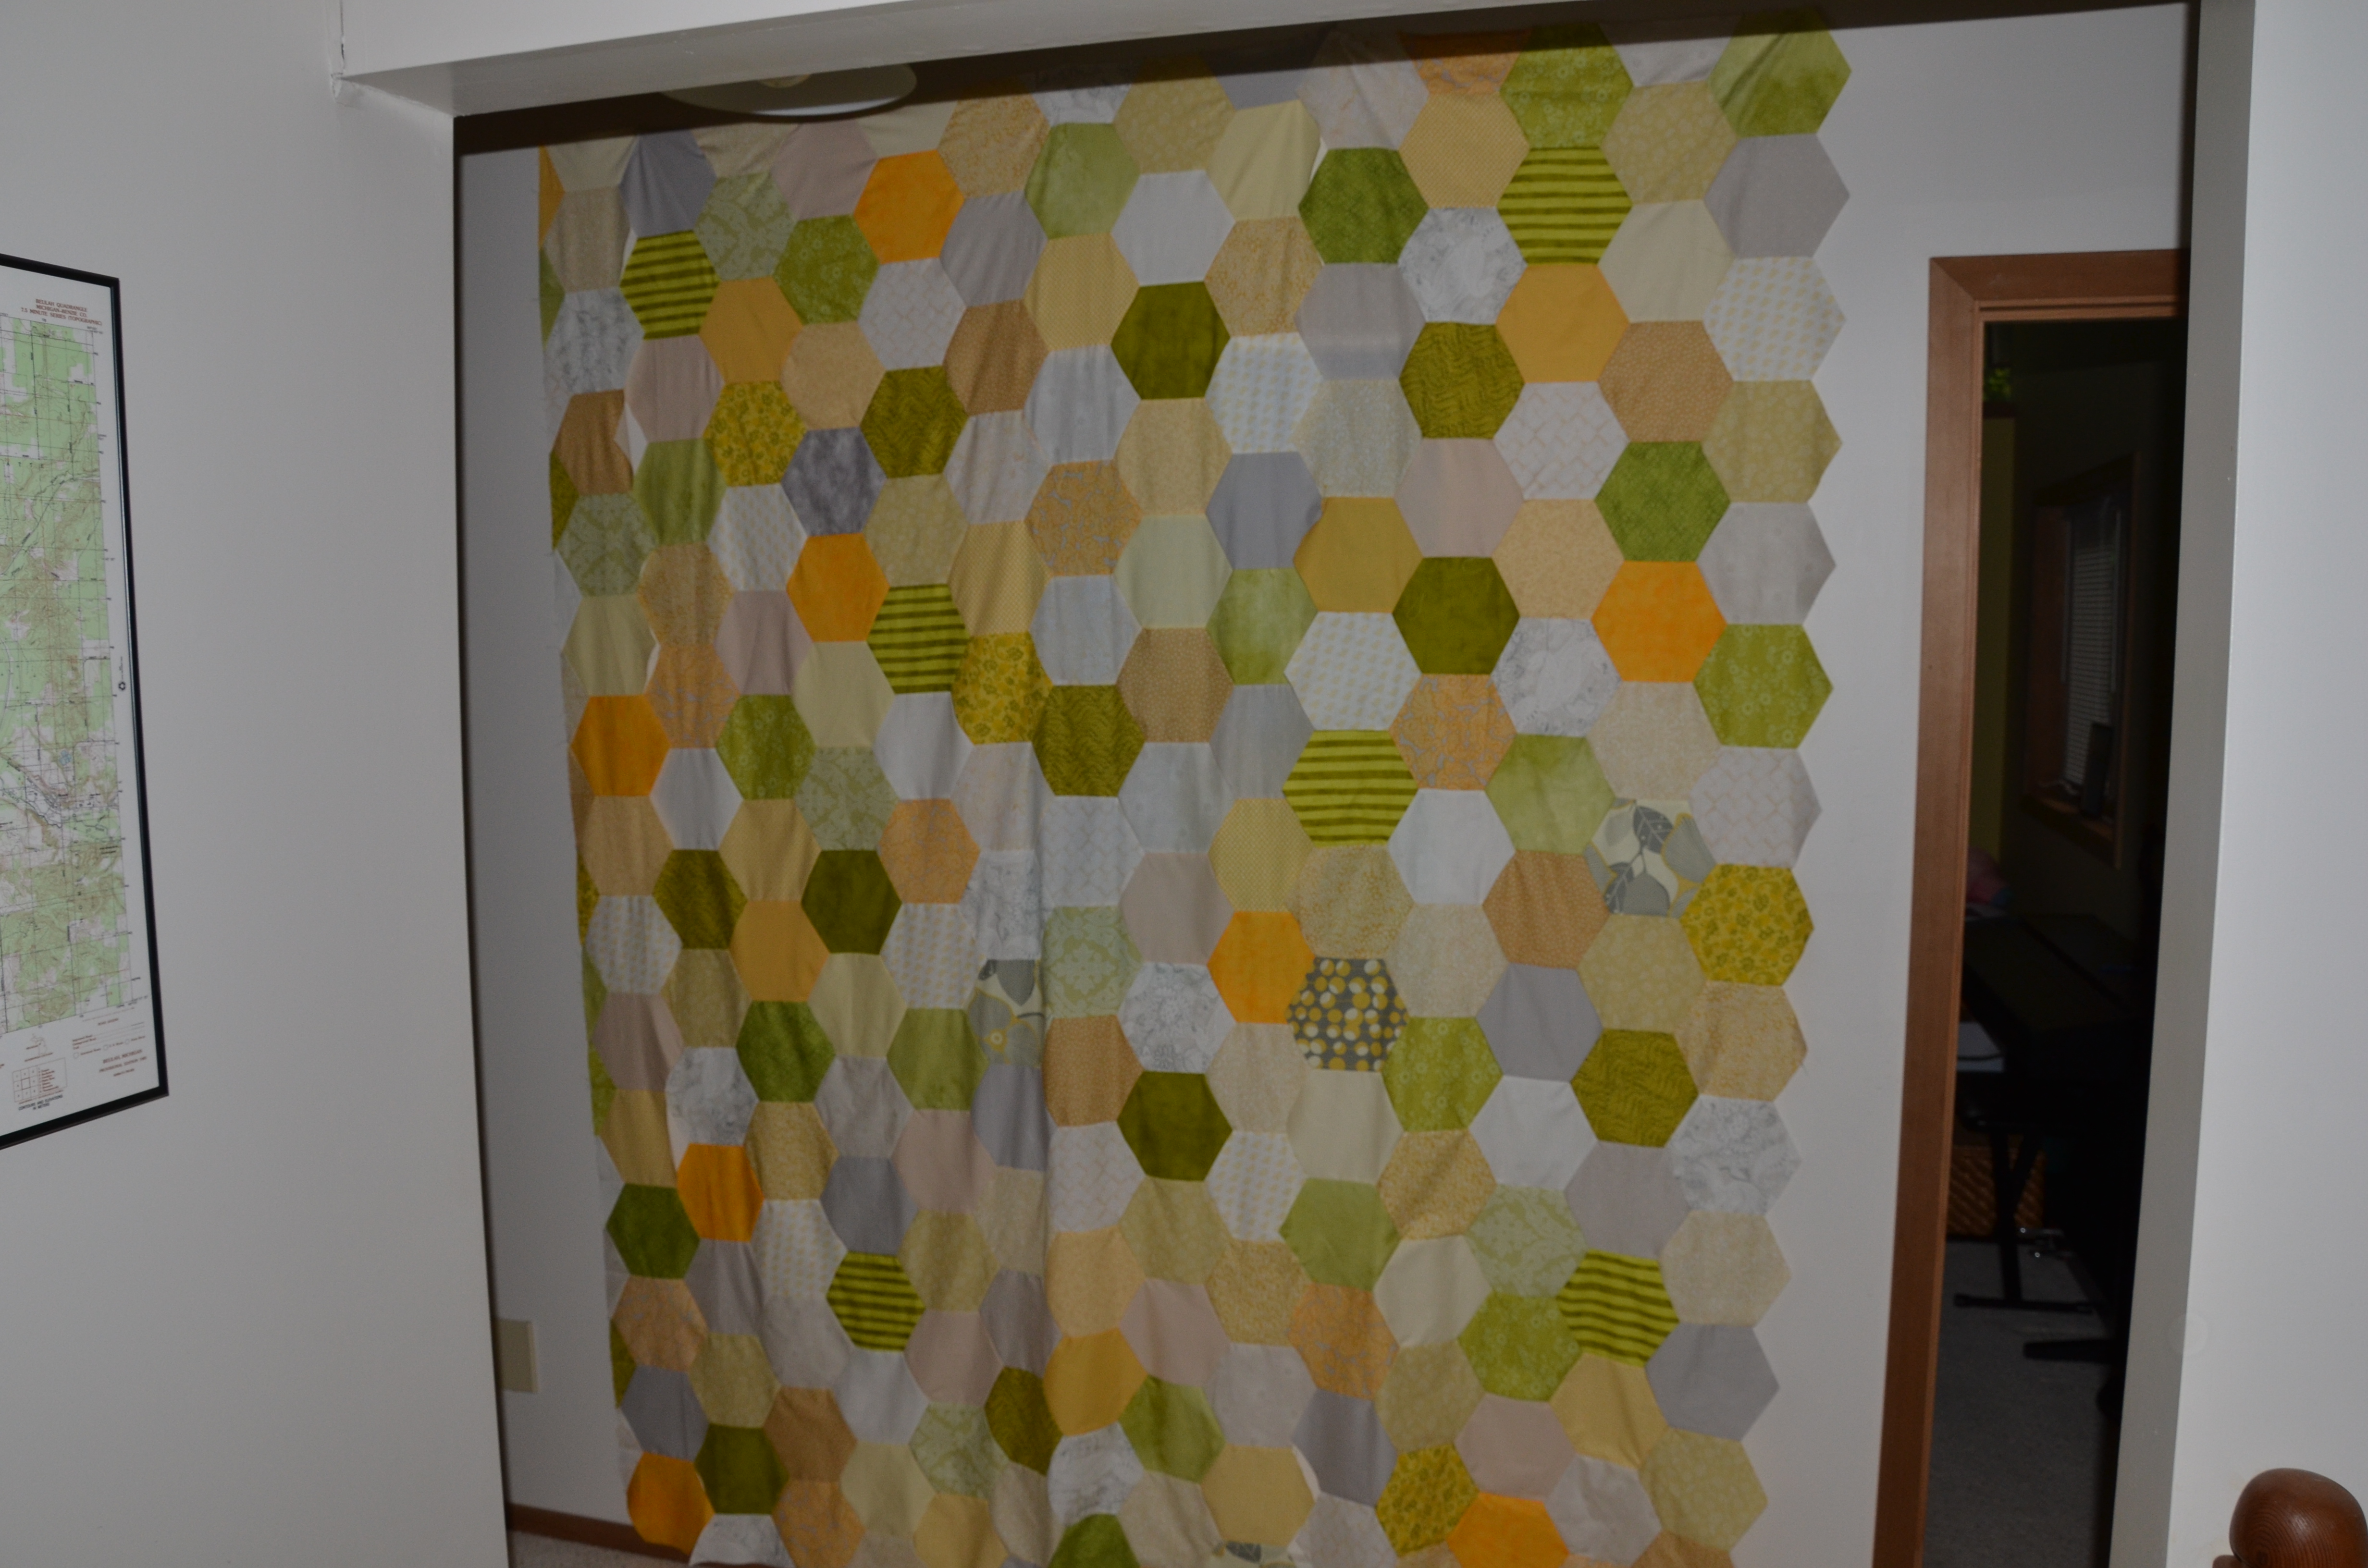
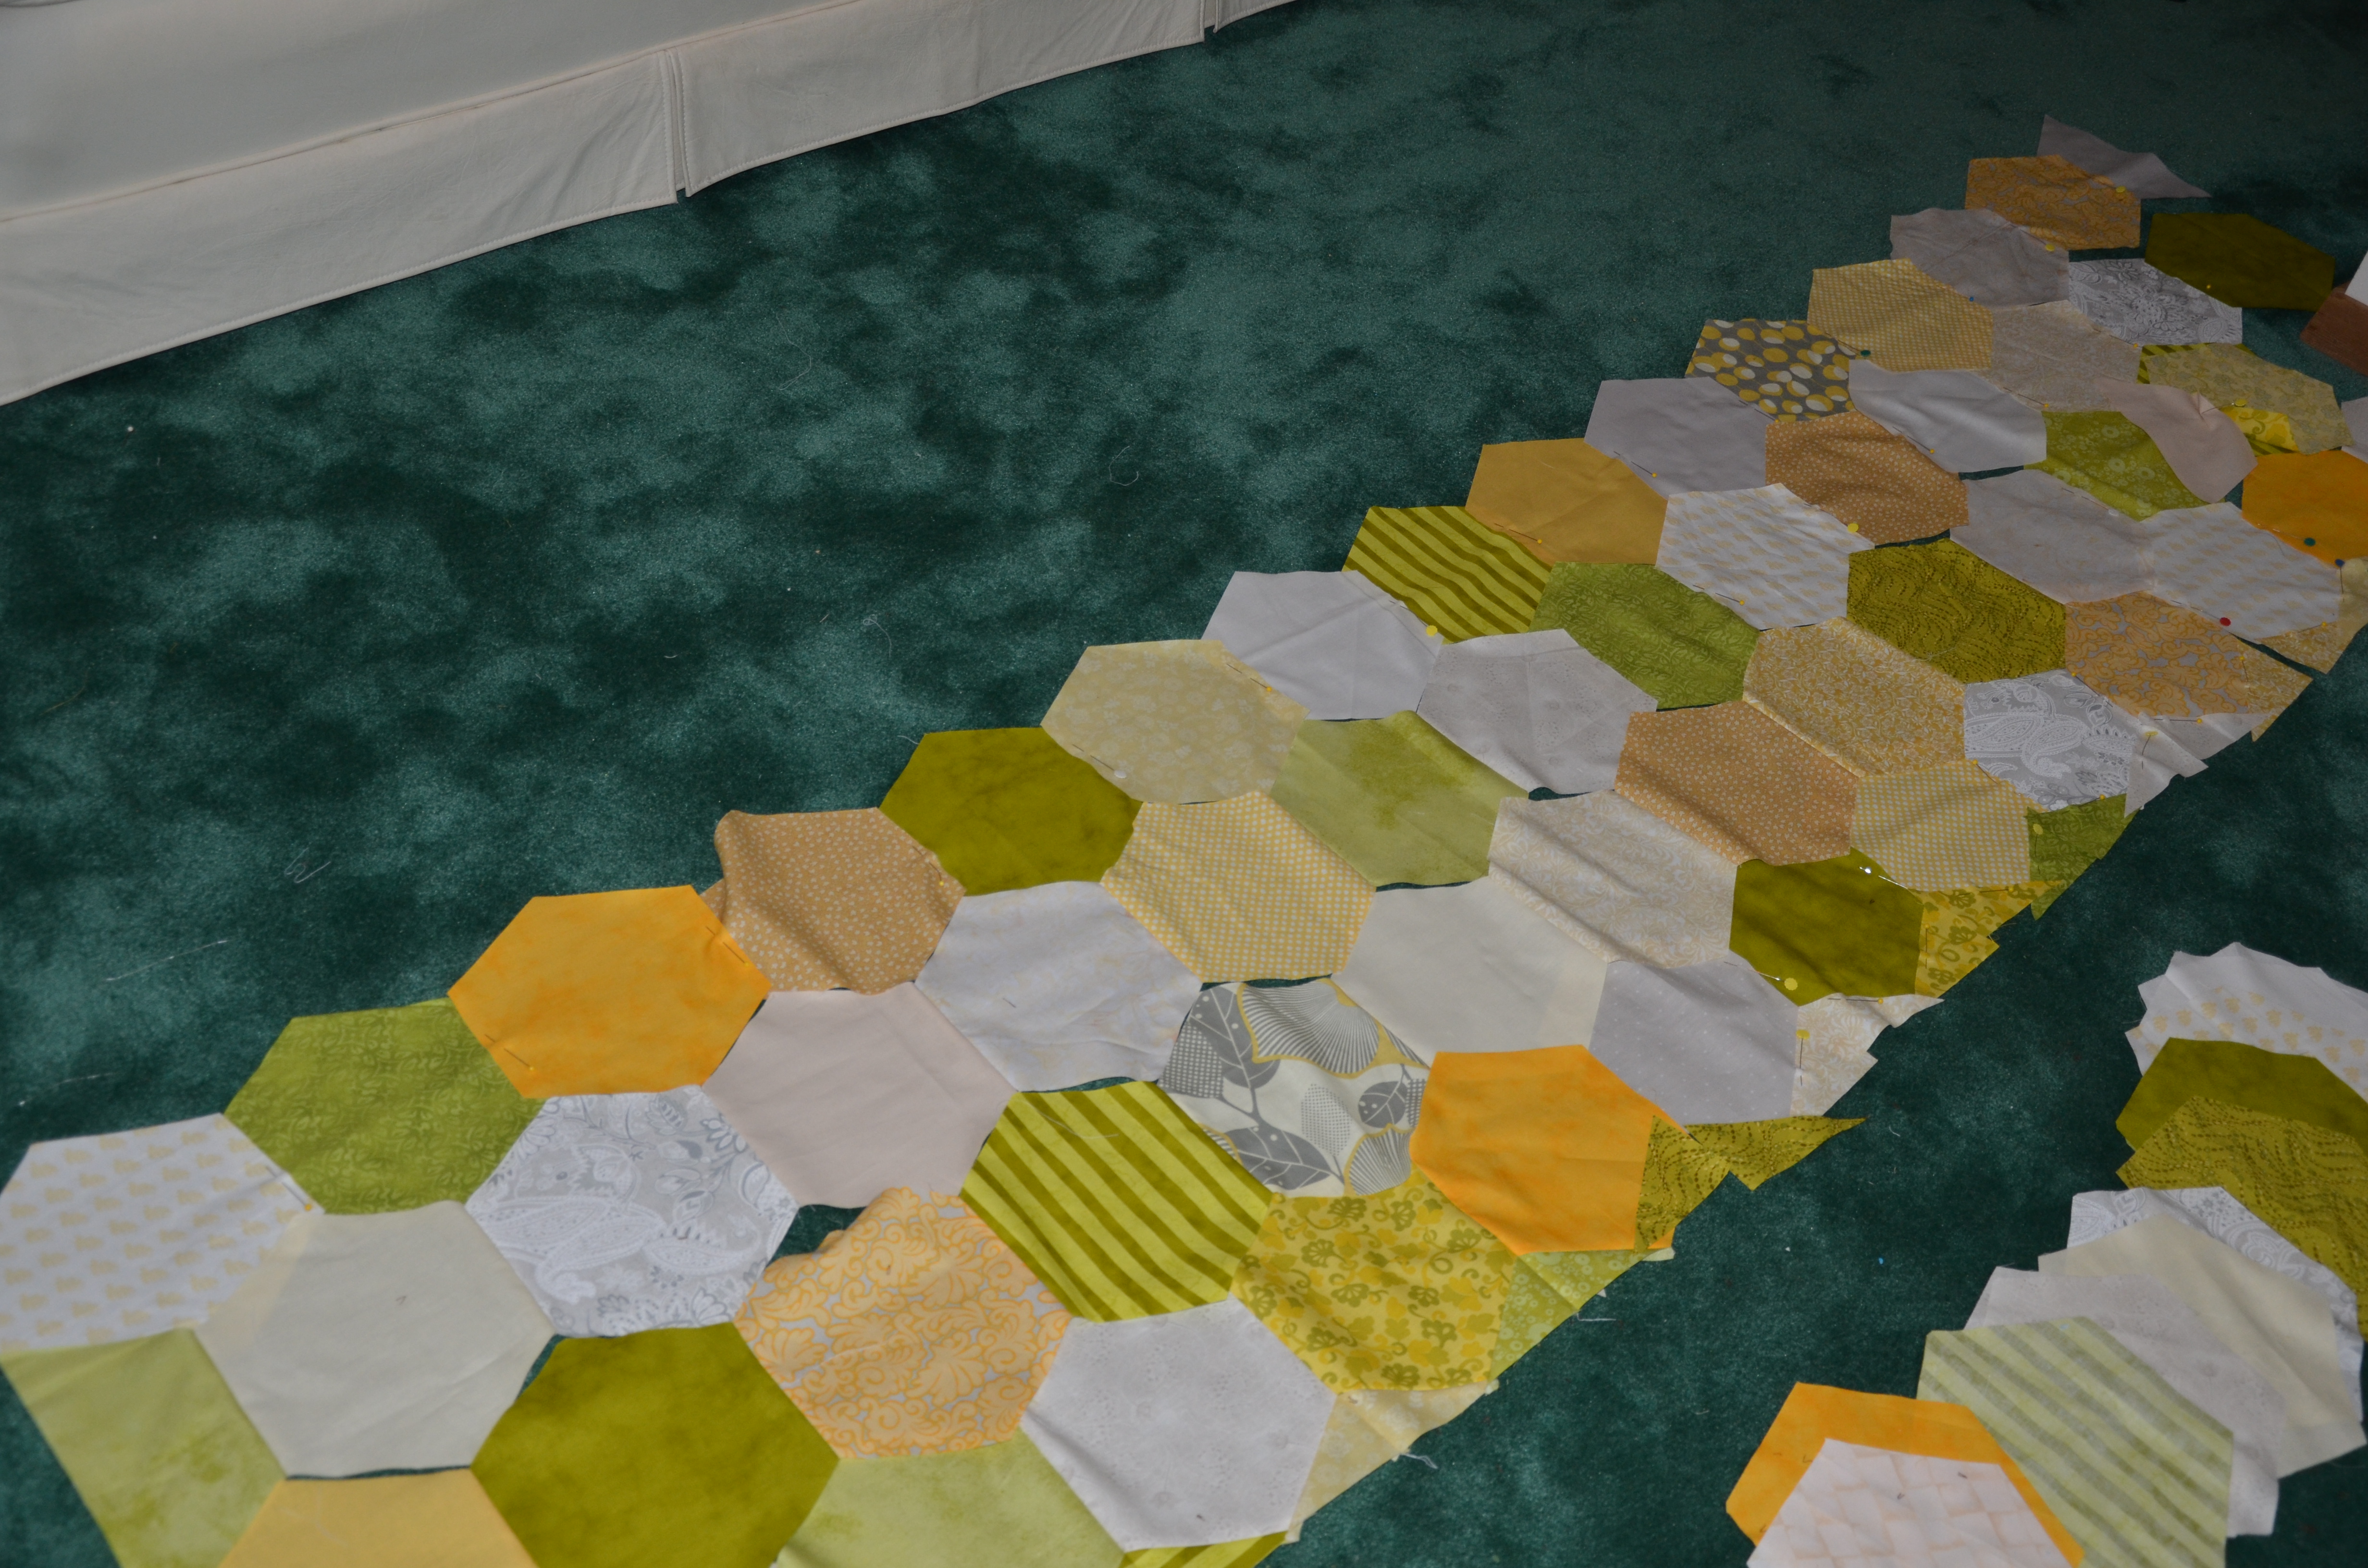
Now that things are closer to our normal, I got to spend a few hours piecing on my Honeycomb quilt. It’s coming. I may even have even been heard saying “this one is a pretty quick one to put together”.

I was kidding.

Myself.

This…

plus this

Equals a really big quilt.

Hopefully before next Wednesday I will have decided between a queen or king. Until then, I just keep plugging away!

Posted in Quilting, Sewing, video, WIP | Tagged , , , , , , | 9 Comments

Oh Happy Day!

I’ve always said going gluten-free wasn’t that hard, for me. I’ve never been a huge bread lover, like some people. Okay, maybe a nice crusty loaf at a good restaurant, a pizza crust in Chicago, fresh pasta in Italy…. I digress as my stomach rumbles…

And now with BLT season upon us, I am tempted by the smell of toast. But a BLT is not about the toast, it’s about the tomato, in my opinion.

I ♥ tomatoes! And this Ox Heart tomato, weighing it at over a pound, was a delight to sink my teeth in to!

But what is a BLT without bread to wrap it in? It’s still good just wrapped in lettuce, my usual sandwich wrap. But to wrap it in a wheat free bread would be delightful!

Behold, my latest and greatest, gluten-free sandwich wrap! This recipe is a winner! The recipe isn’t mine but the bread I created is! It was actually developed by Kate, over at Gobsmacked. And boy does she do some good-looking gluten-free cooking. And thank goodness she loves to share and encourages us all to spread to goodness!

I’ve tried several recipes, around the web, and have come up with lots of interesting breads and several that turned out to be crackers, but this one did exactly what it said it would and was exactly what I was hoping for. It is soft and pliable but firm enough that it isn’t fragile. And it stays fresh for more than a day, unlike most breads I’ve made. Heck, three or four days later it’s still fresh feeling!

I love the ability to swap out flours and seasonings based on what I have on hand, too.

Every time I make it, it is my new favorite flavor, LOL!

Gluten Free, Whole Grain, Sandwich Wraps
printer friendly recipe

Recipe makes one jelly roll pan of wraps
(while you’ve got all the flours out, you might as well mix up enough for another batch!)

1/4 cup sorghum flour
1/4 cup millet flour (I used Quinoa)
1/4 cup potato starch (NOT flour)
1/4 cup tapioca starch
1 TBS yeast
2 TBS powdered buttermilk or non-dairy powdered milk (Soy powdered milk works for the dairy-free)
2 tsp xanthan gum
3/4 cup of warm water (+/- TBS of water depending on the weather)
1 1/2 tsp agave nectar (or honey or even sugar)
1 tsp olive oil
1 tsp apple cider vinegar
3/4 tsp salt
3/4 tsp cracked black pepper*
3/4 tsp cumin*
3/4 tsp dill*
3/4 tsp fennel*

*Feel free to omit the seasonings (but not the salt) if you prefer a plain flavor. I found the herbs to be an amazing addition, for my sandwiches.

Preheat your oven to 400°F.

Mix together the dry ingredients in the bowl of your mixer – sorghum, millet, potato starch, tapioca starch, xanthan gum, yeast, powdered buttermilk, salt and optional seasonings.

Mix together the water (start with 3/4 cup), agave nectar, olive oil and vinegar.
Pour the liquid ingredients into the dry and mix on low until blended. The dough should not resist the beaters and bounce around in the bowl but rather be more of a soft cookie dough – maybe even a bit more wet.

Beat the dough on high for no more than 2 minutes.

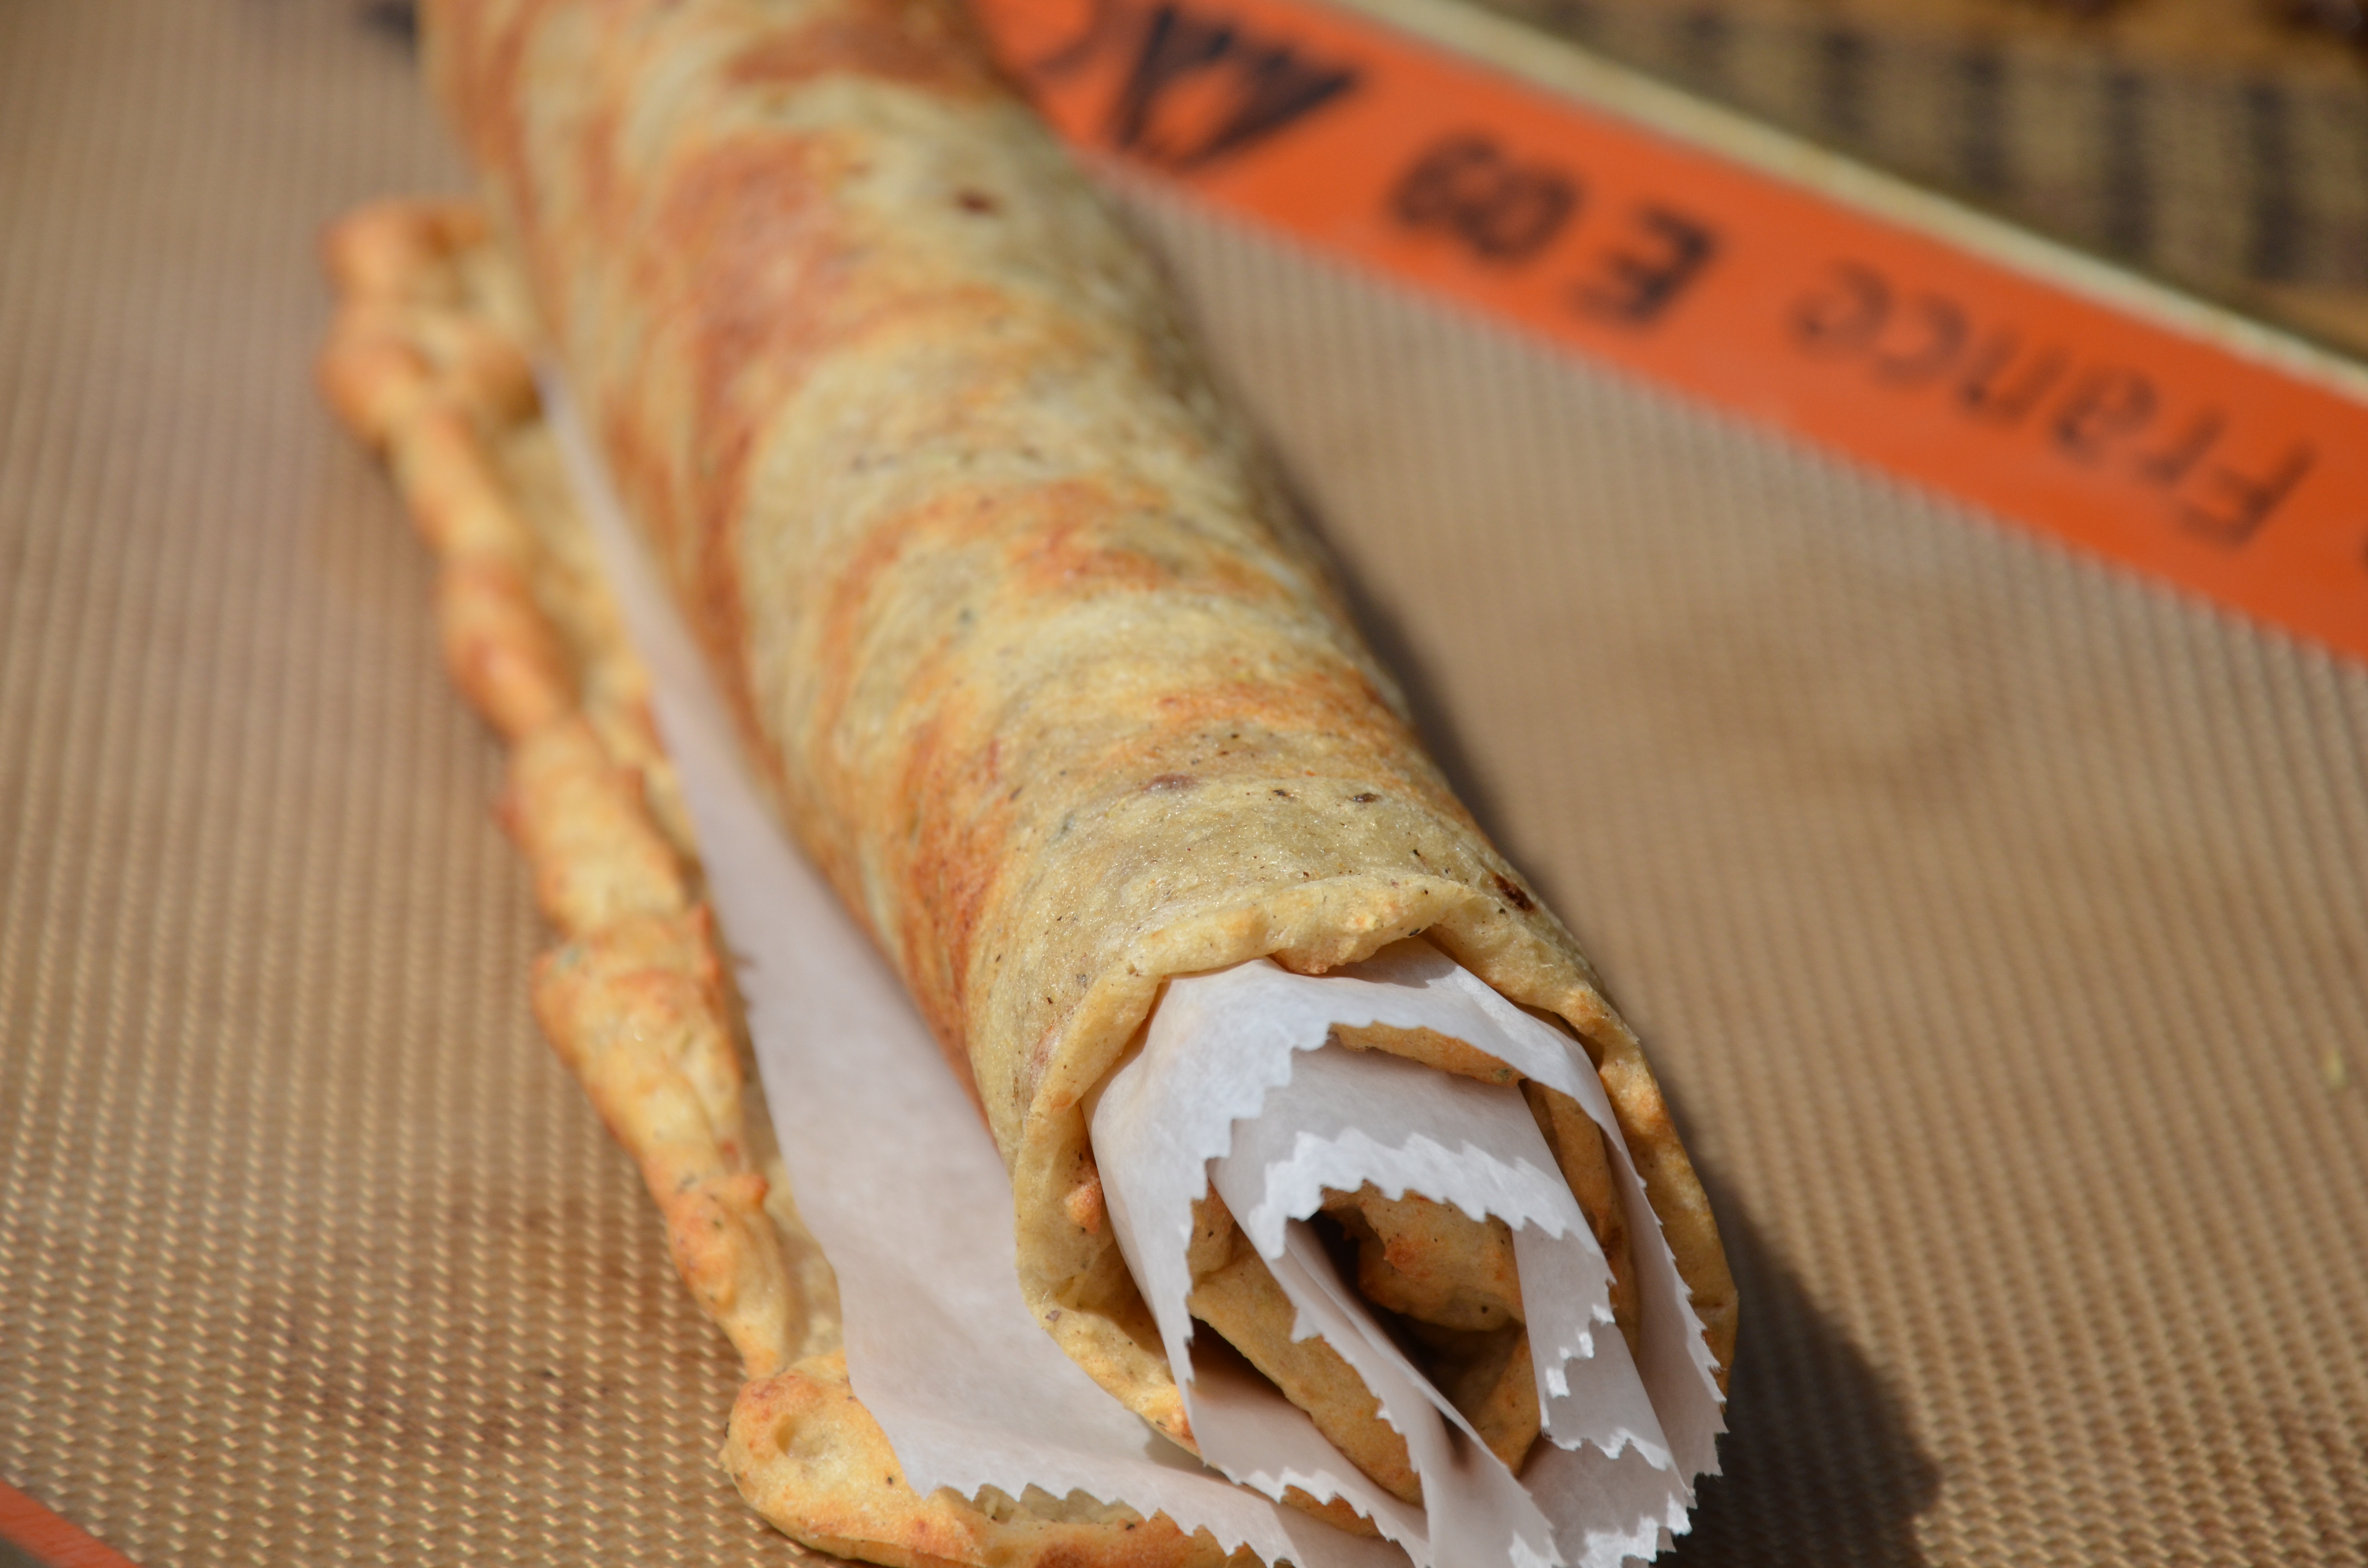
Line a jelly roll pan with parchment paper or use a Silpat. Spread the dough as thinly as possible to cover the 10 x 15″ jelly roll pan. I used a silicone spatula and spread all the way to the orange line of my Silpat. After it was spread, pretty good, it had relaxed enough, I know GF doughs don’t really “relax”, but it loosened up enough to spread even more smoothly. If you are struggling, you could dip your spatula in water to spread with. I hear some people have been known to add extra water to where it was almost pourable, then just cooked it longer. I haven’t tried that yet because spreading this smoothly isn’t really a big deal.

Bake at 400°F for 13-16 minutes until the top begins to brown and the edges are browned. It  been 16 minutes, on the nose, every time I’ve made it. Let cool completely before storing in an airtight bag. If there is any left after lunch….

I rolled it with a piece of parchment paper while it was still warm, to give it a nice shape. After it’s cooled, I take a pair of scissors and cut off the size and shape, I need, depending on what I am going to eat with it.

Adding a thick smear of ripe avocado ups your healthy fats, and flavor, while cutting down on the amount of mayo needed to make for a drippy, luscious sandwich. And eating a BLT, as a wrap, has the added bonus of nothing slipping off one of the sides!

Non, non, nom!

Cheers!

Posted in Cooking, Dairy free, Eating, Favorite Things, Gluten Free, Recipes | Tagged , , , , , , , , , , , | 4 Comments

How I draft a simple pattern

Anyone care to share their favorite sewing reference book? I’m looking at One-Yard Wonders and Sew Everything Workshop. I was thinking there was another one than I kept seeing referred to and can’t remember what it was. Daughter is looking to teach herself to sew without me over her shoulder. All ideas and suggestions welcome!

I picked up a yard of fabric of Stitched in Color’s, Oval Chain in Yellow and Gold, a few weeks back. I just love this line by Malka Dubrowski. It seems as if it’s getting harder to find, specific pieces anyway, but Moona Fabrics still has quite the selection, if you’re looking.

My intention, with this fabric, was to cut a *real* PJ pattern for my youngest daughter, while she was here visiting. It took me a while, but I finally got around to it, yesterday. She had two pair of favorites, so I compared the two and found out they were basically the same except for the height of the back waist.

This is how I create a pattern. I lay my example out, being careful to keep the grain straight, up and down. I then trace the front and the back exactly. The front is easy, because you can arrange your pants to fold the back out of the way. To cut the back, because it will be larger than the front, causes you to have to trace one edge, then roll the PJs, as needed, (an additional row of pins down the center helps keep everything aligned and straight), to get to the opposite seam. After it is all traced, I then add a 5/8″ seam all around. I like 5/8″ because it is the perfect seam width for French seams. And I do love a good French seam, especially, when you don’t have a serger handy to clean up your seams. I also add 2″ at the top, of both the front and back piece, for the casing, to accommodate the 1 1/2″ elastic, I like to use.

I then cut them as long as my 1 yard piece of fabric would allow, which was about a 6″ inseam. For the record, these were adult, Old Navy size small and a one yard cut was perfect. Even enough to line up the design on the side seams.

Making a sewing pattern

I then basted them all together, even pulled the elastic through, to get a more accurate, first fitting.

At this point, I usually have to drop the front waist, for me. For her, I usually have to raise the back waist. This is also when we would decide how fitted or baggy we want them. I then turned up a hem, because she loved them, as is. Not adjustments necessary! Fabulous!

Later I will take them all apart and cut a real pattern that she can use herself, not just my usual chicken scratch, sort of patterns, that no one else can read! Then maybe I’ll have her put them back together.

Last week’s Honeycomb quilt is coming along nicely. I think I’m one row short of being half way there. I still have to cut the partials for the sides but all the full hexagons are cut and the fabrics are picked up. It feels a lot less cluttered to get the quilt off the floor and on to the wall!

Jumbo Hexagon quilt

Same daughter and I snuck out, last night, and took some pictures preparing for an upcoming Landscape quilting class we are taking.


We are so excited we can hardly stand it. Well, she is excited, I am filled with nervous anxiety. Seems like this is the summer of stretching myself by trying new techniques. I’ll share more soon.

Posted in fabric, Fabric Tuesday, Nature, Photography, Quilting, Tutorial, WIP | Tagged , , , , , , , , , , , | 7 Comments

Another example of how to choke down your vitamins.

Blueberries anyone?

As one of the few fruits native to North America, blueberries have been found to be a superfood, so good for you that you should go out of your way to eat them. They neutralize free radicals, protect your heart, improve your vision, and protect against degenerative brain diseases. (See the whole story at The World’s Healthiest Foods website.) I love to eat them by the fistful!

My original plan was to spread them on cookie sheets, straight from the box, and freeze them. After they are frozen I would put them into Ziploc, or glass jars, to store in the freezer, for winter use. I will rinse them off when I use them, not before. Otherwise they will stick together and be an awful mess. And now scientists have been found that the berries do not lose any of their delicate anthocyanin antioxidants when frozen, so freezing when they are bursting with ripeness is not to be missed!

But somebody around here believes that when blueberries are in season, the *only* thing to do with them is make a blueberry pie. Good thing I picked up plenty!

Normally I would whip out a couple of French pâte brisée pie crusts and carry on.

Pâte Brisée

2 1/2 cups all-purpose flour
1 teaspoon salt
1 teaspoon granulated sugar
1 cup cold unsalted butter, cut into small pieces
1/4-1/2 cup ice water

Secrets to a good pie crust: chilled ingredients and chilled dough.

Put flour, salt and sugar in a bowl, blender or food processor. Add the pieces of butter and process about 10 seconds or until it resembles coarse meal.

Add ice water drop by drop while machine is running (or you are mixing)— just until dough holds together without being wet or sticky. Do not mix longer than 30 seconds.

Divide dough in to two pieces and wrap in plastic wrap. Press down slightly. Chill for at least one hour. Proceed as you usually would for pie crust.

But since going gluten-free, and since I am at the cottage, without all my flours, I needed a quick and easy GF pie crust. While sorting through the pantry I remembered I had a bag of Pamela’s GF bread mix and as with most of Pamela’s products the packaging is covered in other recipes that can be made with her mixes. Sure enough you can make pie crust with her bread mix!

And because you still use 2 sticks of butter, it smells and crumbs like a traditional pâte brisée!! It couldn’t be easier!

Blueberry Pie
from Williams-Sonoma Collection Series, Pie & Tart, by Carolyn Beth Weil (Simon & Schuster, 2003).

2 rolled-out rounds of your favorite pie dough
4 cups blueberries
1 TBS fresh lemon juice
3⁄4 cup sugar
3 TBS cornstarch
1⁄2 tsp finely grated lemon zest
1⁄4 tsp salt
1⁄4 tsp ground cinnamon
1 TBS cold unsalted butter, cut into small pieces

Fold 1 dough round in half and carefully transfer to a 9-inch pie dish. Unfold and ease the round into the pan, without stretching it, and pat it firmly into the bottom and up the sides of the pan. Using kitchen scissors, trim the edge of the dough, leaving 3/4 inch of overhang. Set the dough-lined pan aside, along with the other dough round, in a cool place until ready to use.

Place the blueberries in a large bowl, sprinkle with the lemon juice and toss to coat evenly. In a small bowl, stir together the sugar, cornstarch, lemon zest, salt and cinnamon. Sprinkle the sugar mixture over the berries and toss to distribute evenly. Immediately transfer to the dough-lined pan. Dot with the butter.

Fold the reserved dough round in half and carefully place it over half of the filled pie. Unfold and trim the edge neatly, leaving 1 inch of overhang, then fold the edge of the top round under the edge of the bottom round and crimp the edges to seal. Using a small, sharp knife, cut an asterisk 4 to 5 inches across in the center of the top, to allow steam to escape during baking.

Refrigerate the pie until the dough is firm, 20 to 30 minutes. Meanwhile, position a rack in the lower third of an oven and preheat to 375°F.

Bake the pie until the crust is golden and the filling is thick and bubbling, 50 to 60 minutes. Transfer to a wire rack and let cool completely to set, 1 to 2 hours. Serve at room temperature or rewarm in a 350°F oven for 10 to 15 minutes just before serving. Makes one 9-inch pie; serves 8.

Curious what new fruit will be at today’s farmers’ market!

Posted in Cooking, Eating, Gluten Free, Health, Recipes, Wellness | Tagged , , , , , , , , , , | 1 Comment

My favorite way to enjoy a golf course.

A week or two ago, Peter and I went to a quilt show in Arcadia, a sleepy little town in northern Michigan. It was a fund-raiser for the local historical society and we weren’t quite sure what to expect.

The new quilts were nice. I didn’t even ask if I could take pictures. But a few of the antique quilts knocked my socks off. All had interesting stories with who they once belonged to, were made for, were made by, which cottage they lived in… It made me smile. If you have ever lived in a small town you know exactly what I’m talking about. The fabrics of antique quilts amaze me. Not what we call designer fabrics by any means, but they are still hanging on and all that were displayed, mostly from the 1920-1930, were in perfect shape. Lots of solids, pale pinks, yellows…. all the soft, yummy colors to keep you cool during the warm summers, of no air conditioning, and probably many of these quilts lived where there was no electricity, for part of the year, anyway. I spotted several tumbler quilts, grandmothers’ flower gardens, double wedding rings, even 2 cathedral window quilts. I should have taken notes, but they are all the quilts we are still making today.
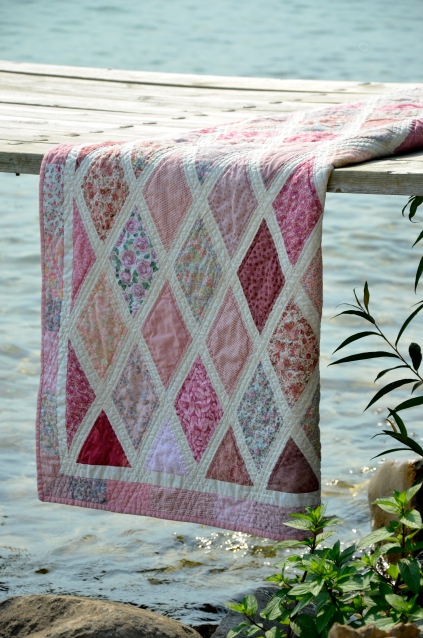
Somehow we are now interpreting these traditional quilts in bolder, louder ways and not always the most restful colors. I also saw quite a few summer quilts, those with no batting. Similar to the bathrobe I wear everyday. I think I need to make one of those quilts. Probably more for wrapping up while out on the deck, than for sleeping under. I don’t know about you, but I like the heft of a quilt to weigh me down when I sleep.

Seeing all these gorgeous old quilts, that have stood the test of time, really challenges me to reconsider my personal quilting style…..

Anyway, we then went out for lunch at Arcadia Bluffs, maybe you’ve heard of it? It is a pretty well-known golf course, #10 in the top 100 public golf courses in the country, sitting on a bluff, overlooking Lake Michigan. We enjoyed a bite, sitting out on the front deck, taking in the view. My very favorite spot on this golf course!

Arcadia Bluffs golf course

Yeah, that’s the view.

Of an extremely challenging course. If you aren’t the praying type you will be before you get to the 18th hole. Maybe even before you get to the 2nd…

On summer evenings there are bagpipes piping, as the sun sets out over Lake Michigan.

After lunch, we were catching a ride back to the car, from the golf cart chauffeur who asked us to check out the sun.

What does a double rainbow around the sun mean

Yes, a double rainbow around the sun. Or more accurately a double halo around the sun. There are caused by ice crystals in the high, thin clouds reflecting sunlight like a prism. I’ve seen it around the moon, in winter.

I just can’t say I look at the sun that often..

Pretty cool, huh?

Posted in Landscape, Nature, Quilt stories | Tagged , , , , , , , , , , , , , | 6 Comments

Diamonds are a Girl’s Best Friend

What started out as a pile of very out of date, small print fabric that I have dipped into for years and years and can’t seem to make a dent in has turned into one of my very favorite finishes, in a very long time. This quilt was inspired by the quilt that Jane Austen made.

I consider myself a hand quilter, but wanted to play with machine quilting and this one seemed like a great opportunity. I quilted 1/4″ inside and outside of all the 1″ sashings. This left 4 ” sections unquilted. This is further far apart than I ever quilt. Normally I quilt everything within an inch of its life or of another line of quilting, whichever comes first. Having only 1/2″ spacing makes for very heavy quilts. Not the case here, this quilt feels like it could float away, it is so light and cuddly. I hope some little girl with wrap her self up in it and feel special and loved. And know that she is.

Jane Austin quilt

Diamonds are a Girls Best Friend

A Sewfrench original
48″ x 68″
Machine pieced, machine quilted.
Warm and Natural cotton batting.
Donated to Margaret’s Hope Chest’s Wrapped in Hope program

Previously discussed here,  here and here.

I was recently struggling with some quilt designs and realized that my stash was seriously deficient in monochromatic fabrics. So after talking with Diana at Pink Chalk Fabrics she put together a very modern, tone on tone, color with white fabrics, things I’ve never owned before, fat quarter group. She can read minds, that woman. What a luxurious hand these new fabrics have. They are even more gorgeous in real life! When my package arrived, I had a little flash of nostalgia. Someday I’m going to miss this old fabric that has been a part of my life still the beginning of my quilting. It has always been there, languishing in the cupboard, and somehow I don’t think it can ever be totally be used up.

But what if it is???

Tell me I am not alone in my thinking. My goal was always to use it up, but now I’m wondering….

  

Posted in 2012 completes, Charity Quilt, machine quilting, Quilting, Sewing | Tagged , , , , , , , | 47 Comments

Pretty, pretty please with a cherry on top?!!

While both our girls were here canning with me, on this day, it is strange that there are no pictures of them… I’m guessing they had their PJs on already!

I am so glad I passed on the knowledge of canning, to my girls and that they proudly do it! Woo Hoo for being publicly acknowledged for it Krystal!

Seems like just yesterday the cherries trees were in bloom.

Cherry trees in bloom

I wouldn’t be a bit afraid and it would be lovely to sleep in a wild cherry-tree all white with bloom in the moonshine, don’t you think? ~Anne of Green Gables

But that was back in April. After 2 solid weeks of temps in the 70s and 80s in March, blooms came much sooner than the last frost. With every frost, more blooms were lost, meaning fewer cherries survived. You may not know it but Michigan produces 75% of the nations tart cherries, those used in pies, cherry juice for their anti-inflammatory benefits, cough syrups and many other food products. We also produce 20% of the sweet cherries and rank #3 in apple production in the nation. You can thank me when that helps you with a Jeopardy question, LOL.

This early bloom caused production to be way down. Prices are up, but what is summer, in Michigan, without at least a few cherries coming through the front door??

It may be Chery Festival in Traverse City, but this is cherry week for us!

First up: Maraschino Cherries

Canning labels

Pitting them doesn’t have to be the pits.

You gotta have this pitter. It is the best cherry pitter ever and I’m not the only one to think so. Yes, it still leaves an occasional pit, be careful and yes, when the cherries are this juicy you still need to wear an apron, but it is so much more effective than any other pitter I’ve ever tried. And being from cherry country, we’ve tried most of them.

Best way to pit cherries

Cooking them.

How do you make maraschino cherries

Canning them.

And to think you can have such a dark, rich, cherry color without any artificial coloring!

Have you seen these Ball brand dissolvable labels? They disappear after running them through the dishwasher. No more label stickers stuck on last years’ jars! Thanks Krystal, I had not seen these, yet!

We used Eve’s recipe, for these cherries, from her The Garden of Eating blog. Though we used a scale and measuring cup, neither measured quite right for us! We needed to use a lot more cherries to fill our jars. We ended up using twice as many cherries as we had planned on. Just cook up as many cherries as you can afford and make up enough liquid to cover them and you should be good! It is a very flexible recipe. We ended up with an extra pint of cherry juice which we canned, also. Perfect for making a cherry limeade or a cherry coke. Not to mention a Mai Tai! And don’t even think about not using the almond extract. It is a must! Who knew but that is what gives maraschino cherries the taste we know and love?!!

Add a couple tsp of cherry syrup in a lemon lime soda, and a squeeze of lime, for a refreshing cherry limeade sans the red food dye.

Dee~lish!

Cheers!

Posted in Canning, Cooking, Cottage, Dairy free, Eating, Gluten Free, Health, Nature, Recipes | Tagged , , , , | 6 Comments