You spoke, I listened.
Plus I really, really wanted to make one of these for myself!
And as long as I was making….
So, as mentioned in the previous post I wanted to make one just a bit larger but didn’t know how inches would translate into usable space. So I decided to just go for it. Previous post gives smaller measurements using the same idea.
To get started you will need:
2 ~ 18″ circles of fabric
2 ~ 13″ circles of fabric
3 ~ 5 3/4″ circles of scrap batting
2 ~ 26″ ribbons
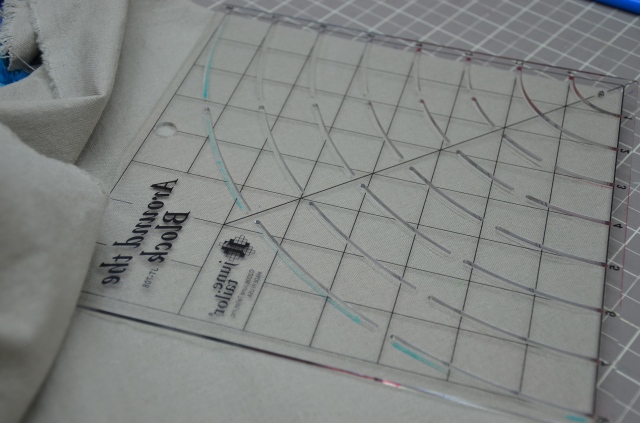
I started out with folding the fabric for the body, outer and lining, into quarters and stacking them. My plan is to cut a circle, of each, 18″. My tool only measures 8″ which would make a 16″ circle. I trace it, anyway.
I then proceeded to add another inch to bring it to 9″ which would be 18″ when unfolded, which I was aiming for. Does that make sense?
Cut that quadrant out, open up and wah lah, you have 2 18″ circles!
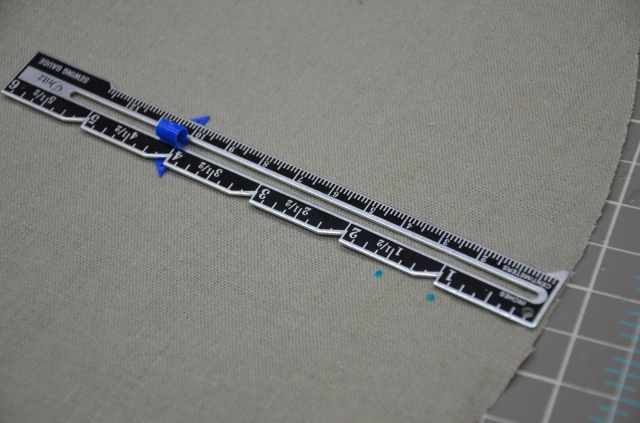
Now measure for the buttonholes, in from the cut edge 1″ and 1 1/2″. One on each side of the circle, opposite each other. I added a piece of interfacing for stability, on the back side, before stitching and cutting 1/2″ buttonholes between my dots. The buttonhole is “only” stitched on the outer fabric. It is done before the two circles of fabric are stitched together. This is what will create the tunnel for the ribbon pull tie.
Mark like so. Stitch your buttonhole between the two dots on the outer fabric.
If buttonholes make you nervous get out your machine’s manual. This is the perfect time to see how easy they really are to make. One on each side, you never see them both at the same time. And besides the ribbon will pretty much cover them up if they aren’t perfect!
Stitch your buttonholes, and then cut them open, before stitching your two circles together with a 1/4″ seam. The good sides of your fabric should be kissing each other. That is why you see the interfacing on the buttonhole. This is the inside/bad side.
Now cut a hole, yes, cut a hole in the center of the lining fabric only! About two inches or so will do it.
And flip it inside out. Press flat. Don’t try to follow by the fabric, I took pictures using multiple bags! Keep reading it will all make sense eventually.
Now cut two circles with a 13″ diameter. If you don’t have circle templates, like I used above, you can use a strip of cardboard and create a compass that is large enough. With your fabric folded in quarters, cut these two pieces at 6 1/2″ measuring from the corner .
Sew these two together with good sides kissing.
Cut a hole in the lining side, the side you won’t readily see, turn, and press flat, same as you did for the larger one.
Now you want to mark this piece in eighths. I did it by steam pressing.
From leftover fleece, or batting, cut 3 circles at 5 3/4″. I used the lid of a tin (it was 6″ so I cut a little smaller all around).
I then used that same tin to mark a stitching circle on the center piece. This fleece is going to give the pouch a more stable bottom. Cutting the fleece a bit smaller allowed me to follow the tin tracing as a stitching line.
I’ve marked over my pressed lines, with a water soluble blue pen, so that you could better see where I will stitch. These will form pockets to hold earrings or smaller pieces of jewelry.
Now my pieces are stacked as they will be when finished. Fleece/quilt batting is between the inner and outer circles, under the center. The holes I cut, to turn the circles inside out, are now hidden in the innards. Now stitch on all the blue lines, through all the layers, securing by using reverse at each stop and start point.
Then flip the piece over and top stitch measuring from the outer edge 3/4″ and 1 1/4″ in, all the way around. This is on both sides of the buttonholes you stitched and will be the casing for the drawstrings.
I now pulled through each of 2 26″ drawstrings, fed with a safety pin, and pulled all the way around the circle, back out the starting hole and secured the ribbon ends by machine. One piece of ribbon through each buttonhole. This will allow you to pull one string with the right hand and the other with the left and cinch it up securely.
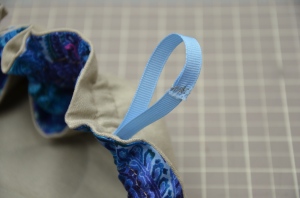
I pulled on the ribbon and fiddled with them to get that seam back into the tunnel and hidden. Do the same through the other buttonhole. I added a knot at the ends of the ribbons to give you something more to pull it closed by.
Once you make one you’ll see just how quickly and easily these go together, you’ll be making them for all the women on your list! Perfect for girlfriends, teenagers, coworkers, babysitters, you name it. Everyone loves a little bag to contain things!
And this one will contain a lot! Plenty big for all your jewels!
Hopefully I’ve explained this well enough and you will let me know if you make one!
Any questions? Please ask!
Have fun!


Pingback: How to carry your bling in style | Sewfrench
Awesome! Thanks for sharing this. I’ll probably be making some for Christmas. And maybe one for my nephew to put his cars in. 🙂
LikeLike
These look great. I wonder if I could be so talented as to try to make one. 🙂
LikeLike
LOVE!!!
LikeLike
Pingback: Show Off Friday #27 | What-About.co
I have one of these I picked up somewhere and they also work great for putting little girl’s hair accessories in while traveling!
LikeLike
Another great use!
LikeLike
Pingback: What I’m working on | Sewfrench
Where did you get your circle template? What’s the brand name so I can search for it. I’ve found similar ones on the internet by Omnigrid but none as large as yours
thanks in advance
LikeLike
I found it!! It’s by June Tailor….
LikeLike
Glad you figured it out!
LikeLike
Thank you for the wonderful free patterns.
LikeLike
Your tutorial has been shared with the Quilt Along with Pat Sloan that has 32,000 followers on facebook! I think you’ll be getting a lot more hits. Love the pouch.
LikeLike
Pat Sloan? That is crazy!!I guess I should friend her!! Thank you Dianne for letting me in on the secret!
LikeLike
I’ve been looking for this pattern. Thank you, and thanks to Pat Sloan for directing me to your site.
LikeLike
Pat Sloan shared it.
LikeLike
Thank you so much for this tutorial! My aunt gave me one of these pouches as my wedding shower many years ago. I’ve often contemplated taking it apart to see how I could make more for friends, but now I don’t need to do that 🙂
LikeLike
I just received one of these as a gift, and it is wonderful!
LikeLike
My Mother in Law used to make these back in the 1980’s. When they were cleaning out her home, I got a lot of her sewing stuff including her pattern and was going to try to make these for gifts. I will try your methodology, I still have mine from her and it is great for traveling becaue you can put it in the bottom of your purse for safekeeping. Thanks
LikeLike
I’ve made one of these before, but we did the button hole after the piece was turned inside out. If you did yours before turning, how did you get the one inch above the button hole turned?
LikeLike
The buttonhole is “only” stitched on the outer fabric. It is done before the two circles of fabric are stitched together. This is what will create the tunnel for the ribbon to pull through.
LikeLike
Thanks so much. Guess I forgot that part.
LikeLiked by 1 person
Voila! I’m making one, thank you.
LikeLike
I’ve still got one I made with antelope and snake skin in Africa 50 years ago. Still in use and have only had to replace the drawstring once! Very handy wee bag.
LikeLike
Oh, Olga, that sounds fascinating!
LikeLike
going to have a go tonight
LikeLike
Reblogged this on daphnedawn and commented:
Great tutorial for jewelry pouches!
LikeLike
Reblogged this on Musings and commented:
This is lovely
LikeLike
I think I better make some of these beautiful bags after reading these great comments.
LikeLike
I am trying to make somthing like this that opens all the way back up into a flat circle than can be closed back into a draw string pouch does this one do this?
LikeLike
I am trying to make somthing like this that opens all the way up into a flat complete circle than that I can close back up into a draw sting pouch will this do that?
LikeLike
Great directions, so happy to find a larger bag!
LikeLiked by 1 person